> ## Documentation Index
> Fetch the complete documentation index at: https://docs.nscale.com/llms.txt
> Use this file to discover all available pages before exploring further.
# Clusters
> This guide provides step-by-step instructions to help users create, manage, and monitor virtual machines within the Clusters. It covers how to select VM configurations, choose system images, connect to project-level networks, and perform lifecycle actions. The guide is designed to support new users in getting started quickly and using the Nscale platform effectively.
**Compute clusters are deprecated.** The cluster API has been removed. Use [instances](/docs/compute/create-new-instances) to provision individual virtual machines or bare-metal nodes, or manage instances via the [CLI](/docs/cli/instances).
## Introduction
### **Cluster Service – Introduction**
The Cluster Service allows users to provision on-demand compute clusters composed of virtual machines or bare metal nodes. Designed for AI, ML, and general-purpose workloads, it provides a streamlined way to deploy and manage multiple instances through a unified UI and API. Networking, storage, and image management are abstracted and handled by the platform, so users can focus on running workloads without managing infrastructure complexity.
### **Benefits of the Cluster Service**
* **No networking complexity:** Instances are auto-connected within a shared project network.
* **Easy provisioning:** Minimal configuration via a single pane of glass covering compute, networking, and storage.
* **Use only what you need:** Fractional flavours reduce cost for inference, testing, and right-sized workloads.
* **Run GPU workloads out of the box:** Images suitable for GPU workloads are available and ready to use, or you can bring your own image.
* **Full control over lifecycle:** Start, stop, and delete instances without requiring orchestration tools.
* **OS-level access:** SSH into cluster nodes to configure and operate the system directly, using the credentials provided when the cluster is created.
## Architecture
This diagram illustrates two high-level deployment models for compute infrastructure:
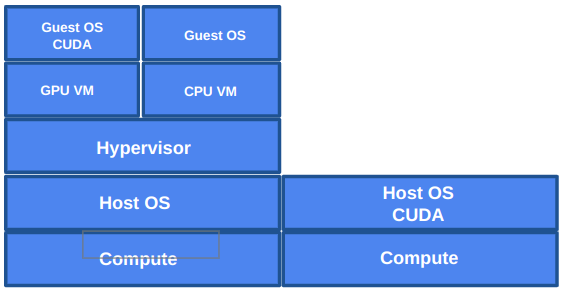 * **Left Side: Virtualised Architecture**
Compute resources are virtualised using a hypervisor running on top of a host OS. Virtual machines (VMs) are provisioned for CPU or GPU workloads. GPU VMs include a guest OS with CUDA support to enable accelerated computing.
* **Right Side: Bare-Metal Architecture**
Applications run directly on the host OS without a virtualisation layer. CUDA is installed at the host level, providing direct access to GPU resources for maximum performance.
## Cluster Provisioning
To create a new cluster, navigate to the **Clusters** section under **Compute** on the left menu.
* **Left Side: Virtualised Architecture**
Compute resources are virtualised using a hypervisor running on top of a host OS. Virtual machines (VMs) are provisioned for CPU or GPU workloads. GPU VMs include a guest OS with CUDA support to enable accelerated computing.
* **Right Side: Bare-Metal Architecture**
Applications run directly on the host OS without a virtualisation layer. CUDA is installed at the host level, providing direct access to GPU resources for maximum performance.
## Cluster Provisioning
To create a new cluster, navigate to the **Clusters** section under **Compute** on the left menu.
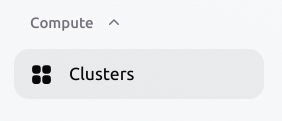 Select **Create new resource**.
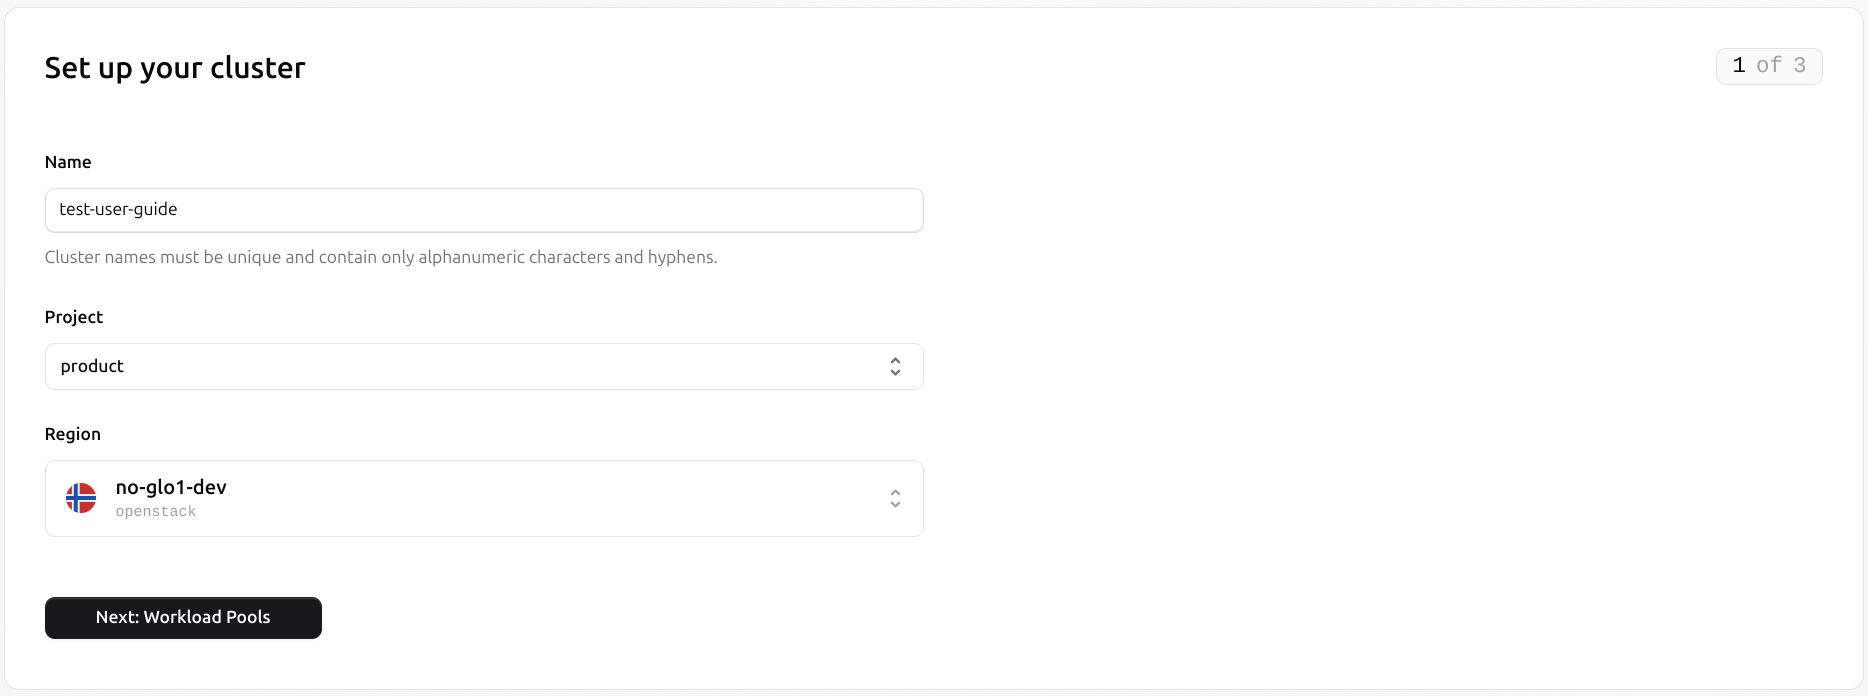
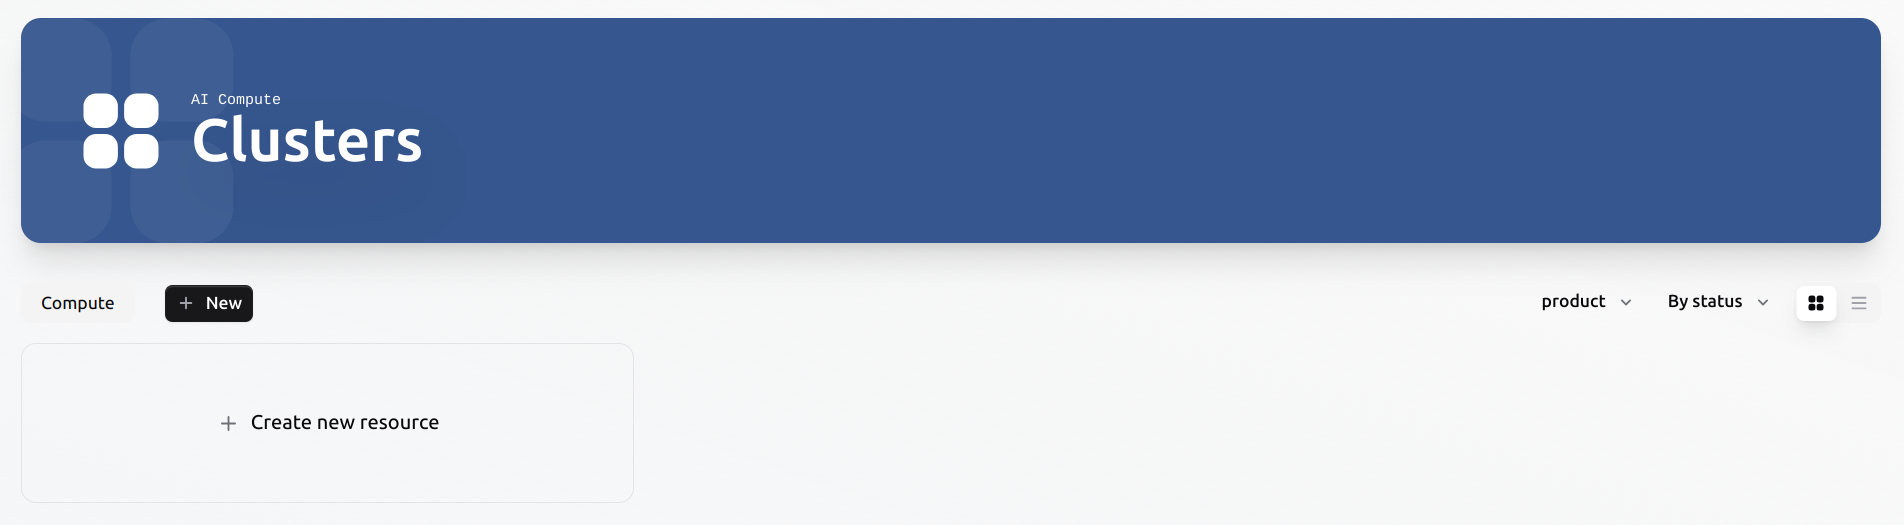 Provide a name, select a project, and choose the deployment region. If you're unsure which project to use, see [Projects](/docs/manage/projects) for guidance on how projects group your resources.
In the next step, define the **workload pool configuration**:
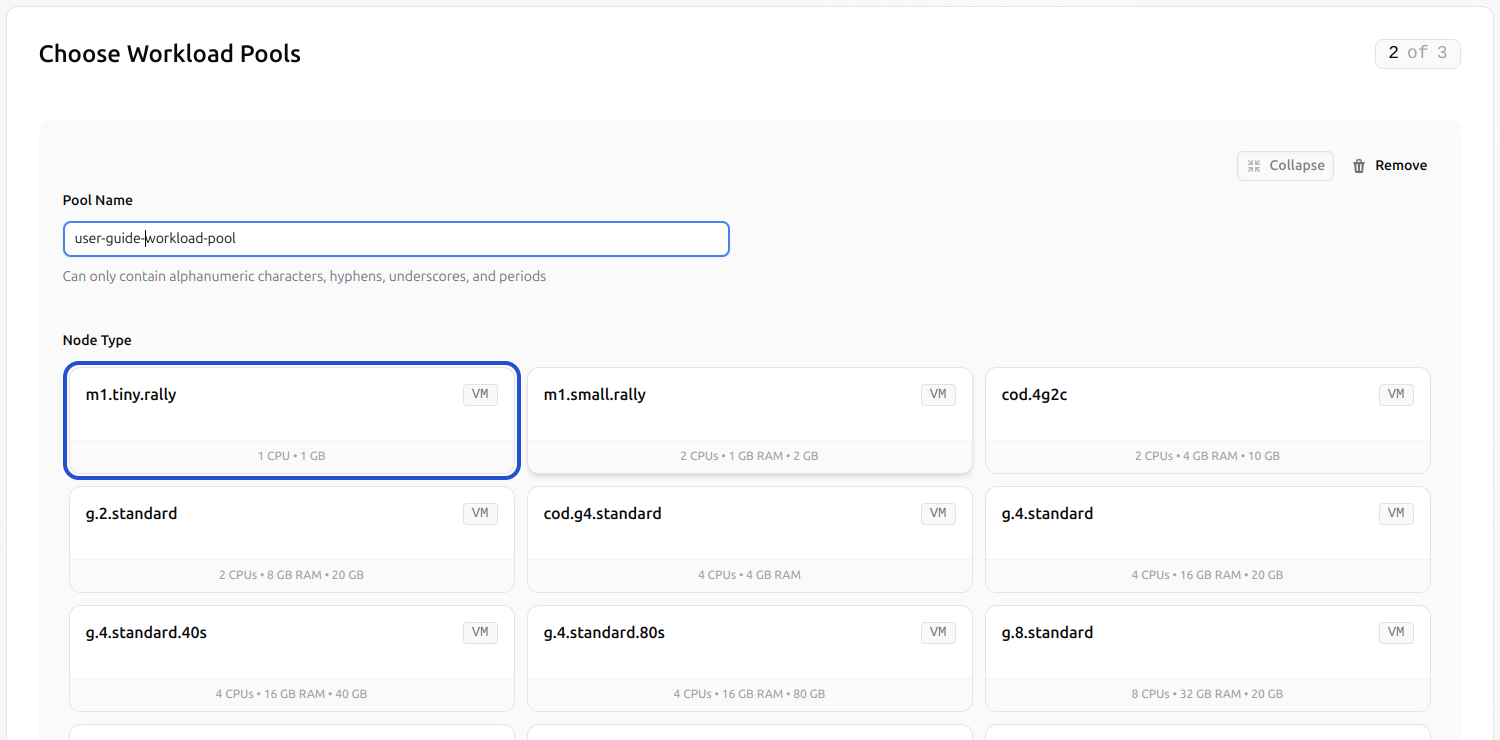
* Set the pool name using alphanumeric characters and hyphens.
Provide a name, select a project, and choose the deployment region. If you're unsure which project to use, see [Projects](/docs/manage/projects) for guidance on how projects group your resources.
In the next step, define the **workload pool configuration**:
* Set the pool name using alphanumeric characters and hyphens.
 * Select the desired **node type**.
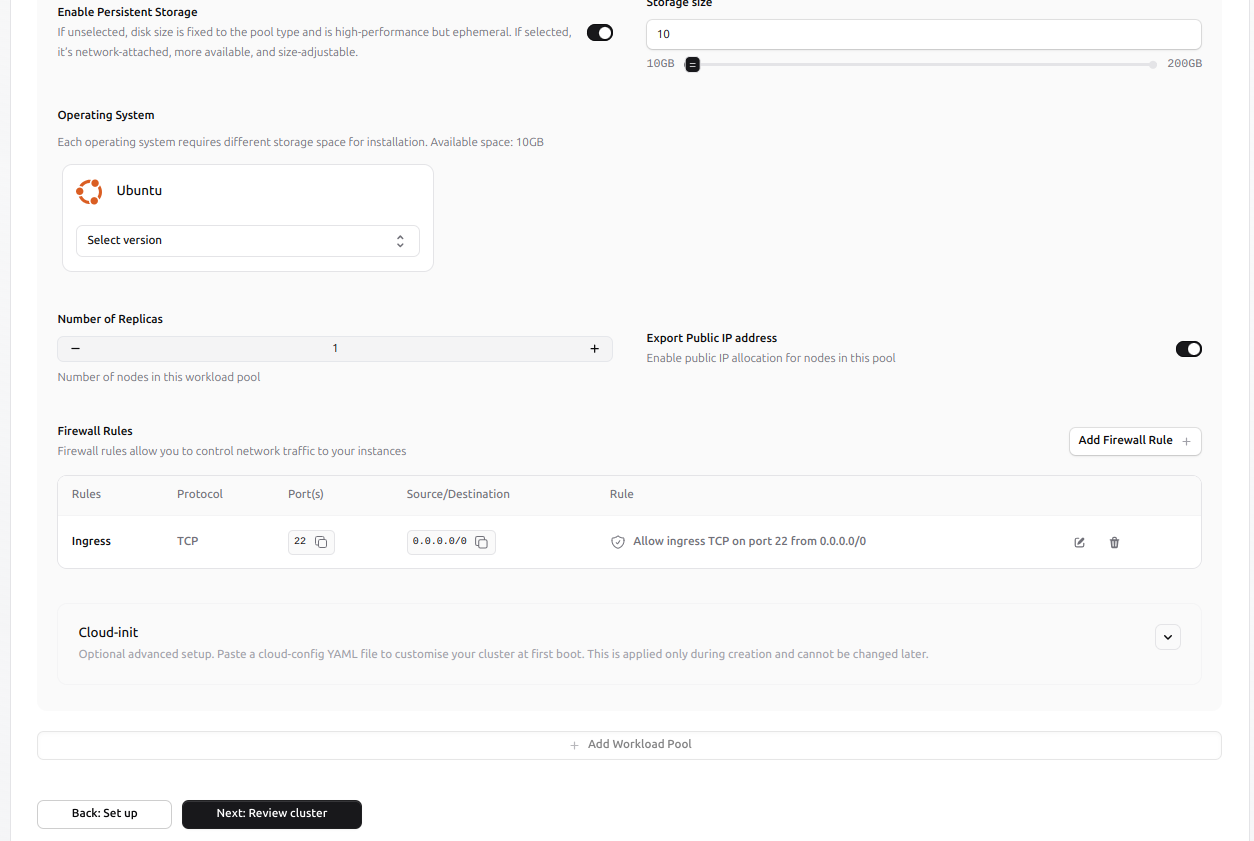
 * Enable **persistent storage** and specify the desired volume size.
* Choose the **operating system version** and define the **number of replicas**.
* Enable or disable **public IP exposure** as needed.
* Configure **firewall rules** to control inbound access (e.g., allow SSH on port 22).
* Enable **persistent storage** and specify the desired volume size.
* Choose the **operating system version** and define the **number of replicas**.
* Enable or disable **public IP exposure** as needed.
* Configure **firewall rules** to control inbound access (e.g., allow SSH on port 22).
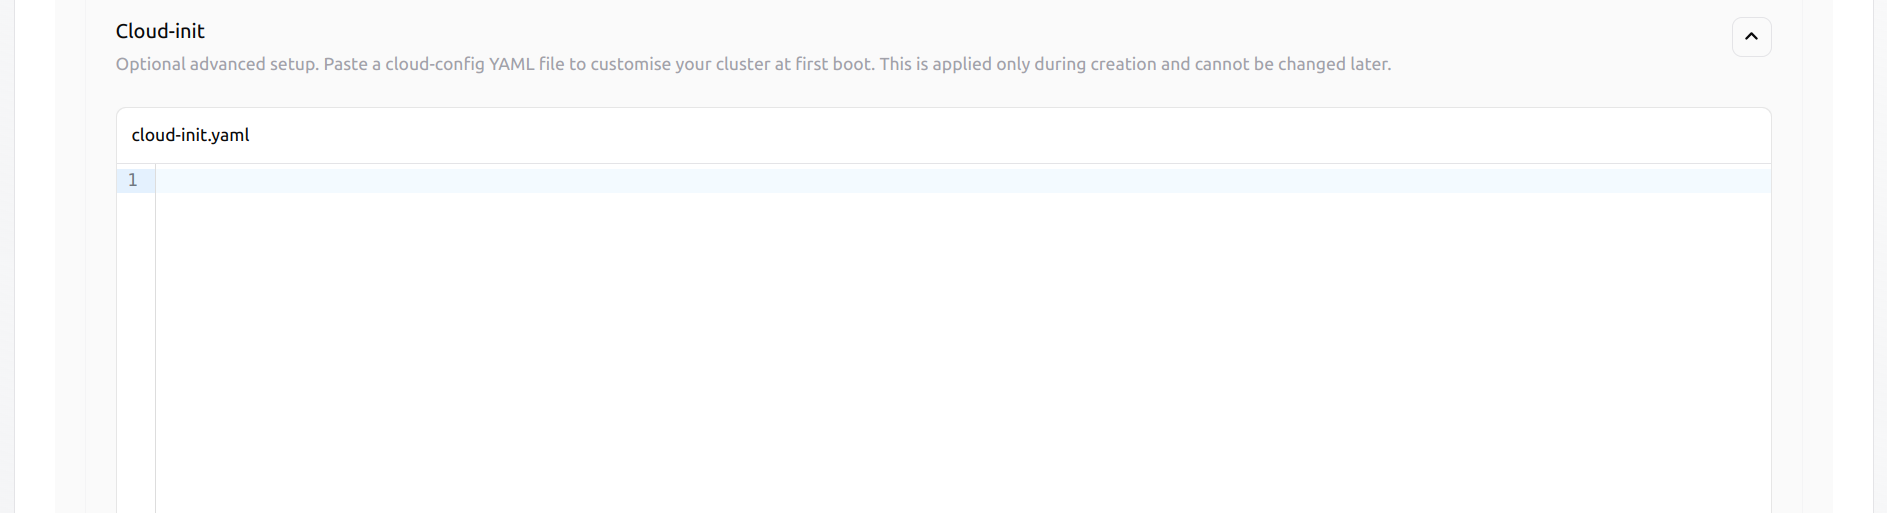
 * Optionally, you can provide a **cloud-init configuration** to run custom setup scripts during the first boot of each node.
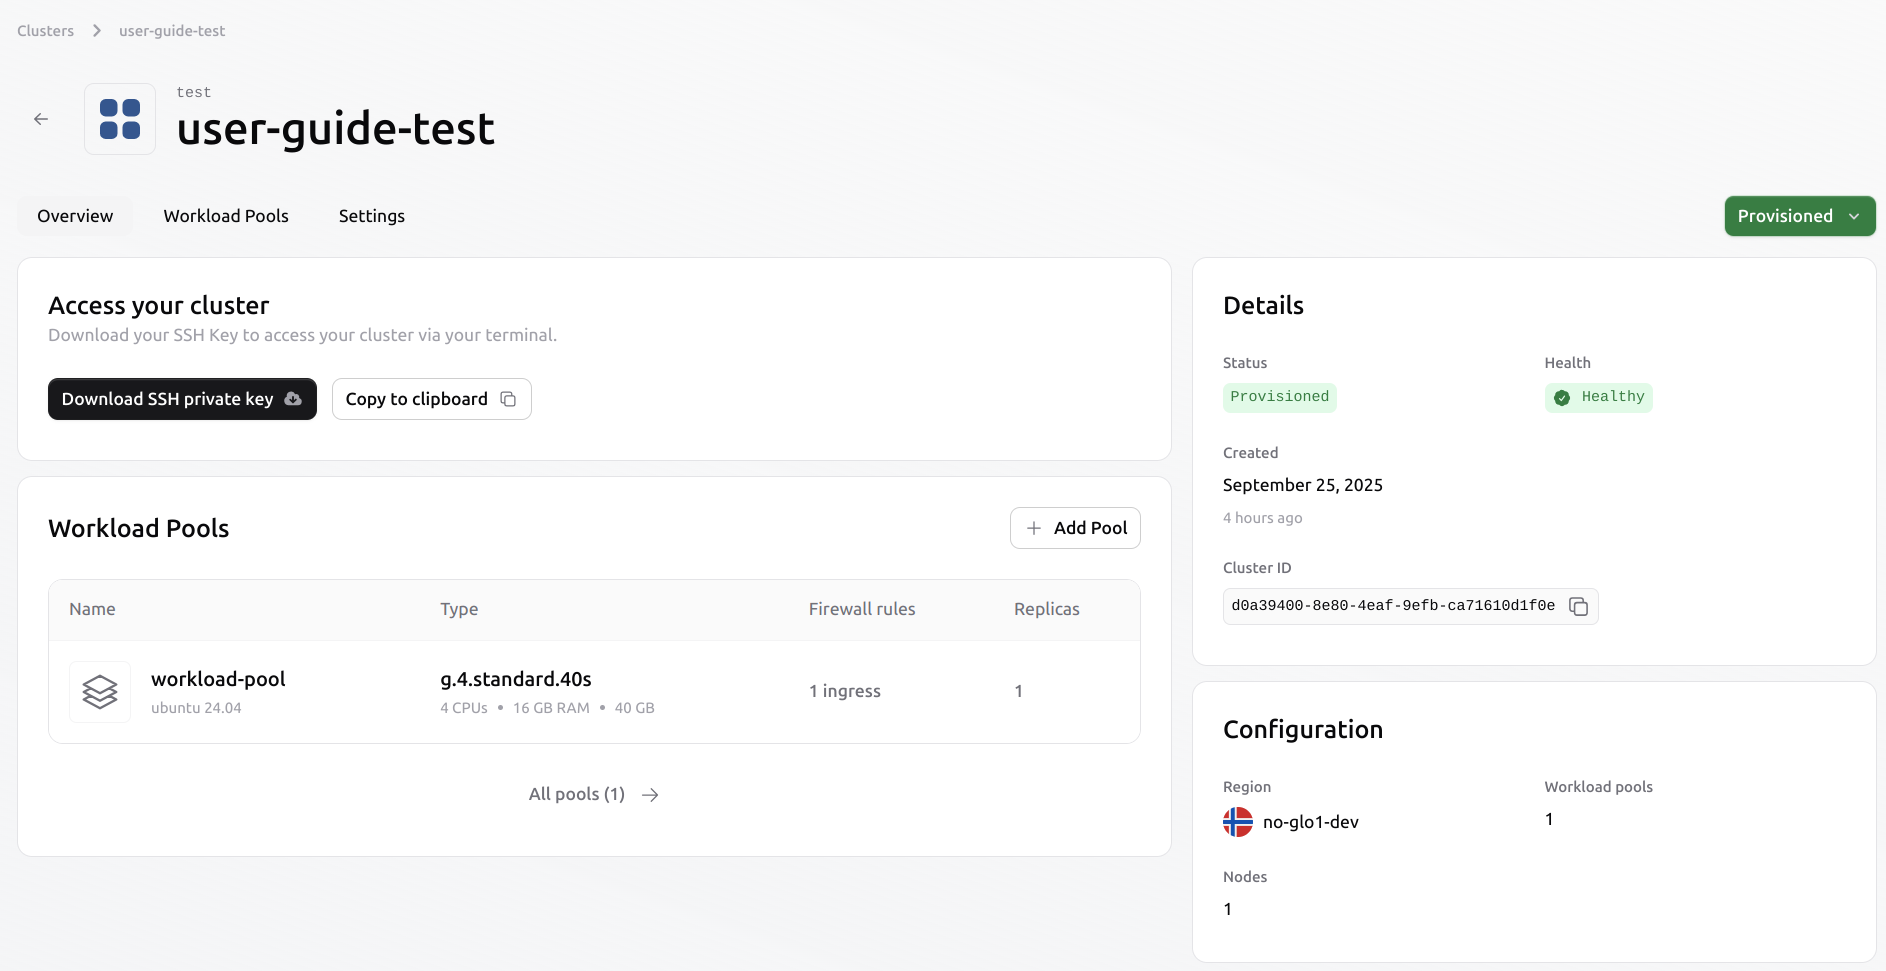
 * Once the configuration is completed, review the cluster and provision it. When provisioning is complete, the cluster status will be set to ‘**Provisioned’**, and connection details, including the SSH private key and workload pool IP addresses, will be available in the cluster overview.
 ## Monitoring and observability
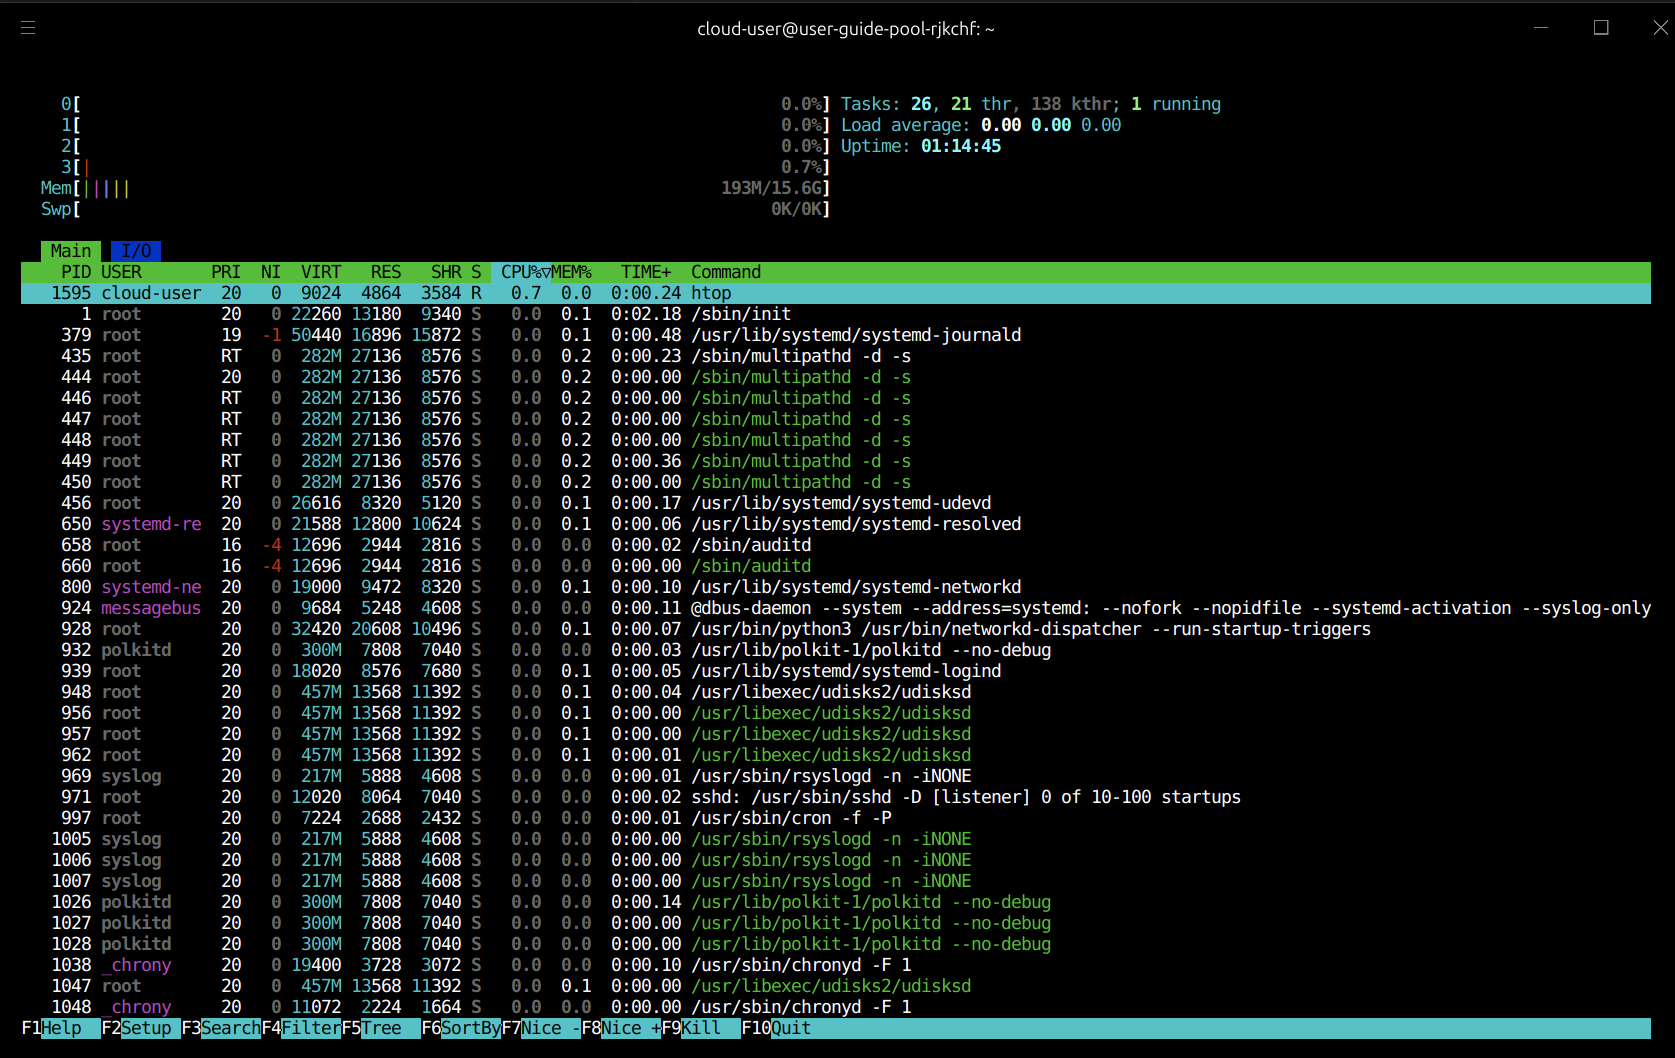
Users can monitor resource utilisation directly from the operating system using the Interactive Process Viewer `htop`.
```
htop
```
More information can be found in [GitHub-htop](https://github.com/htop-dev/htop?utm_source=chatgpt.com)
## Monitoring and observability
Users can monitor resource utilisation directly from the operating system using the Interactive Process Viewer `htop`.
```
htop
```
More information can be found in [GitHub-htop](https://github.com/htop-dev/htop?utm_source=chatgpt.com)
 ## Create a new pool on the existing cluster
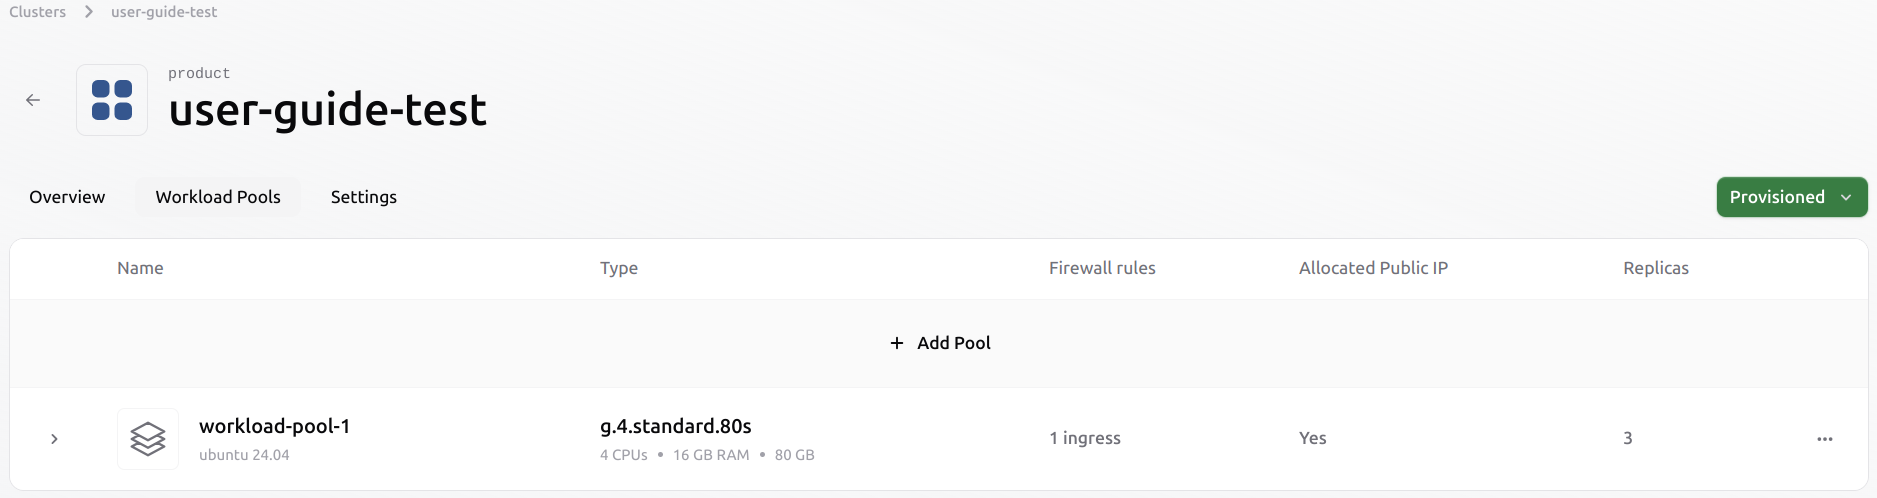
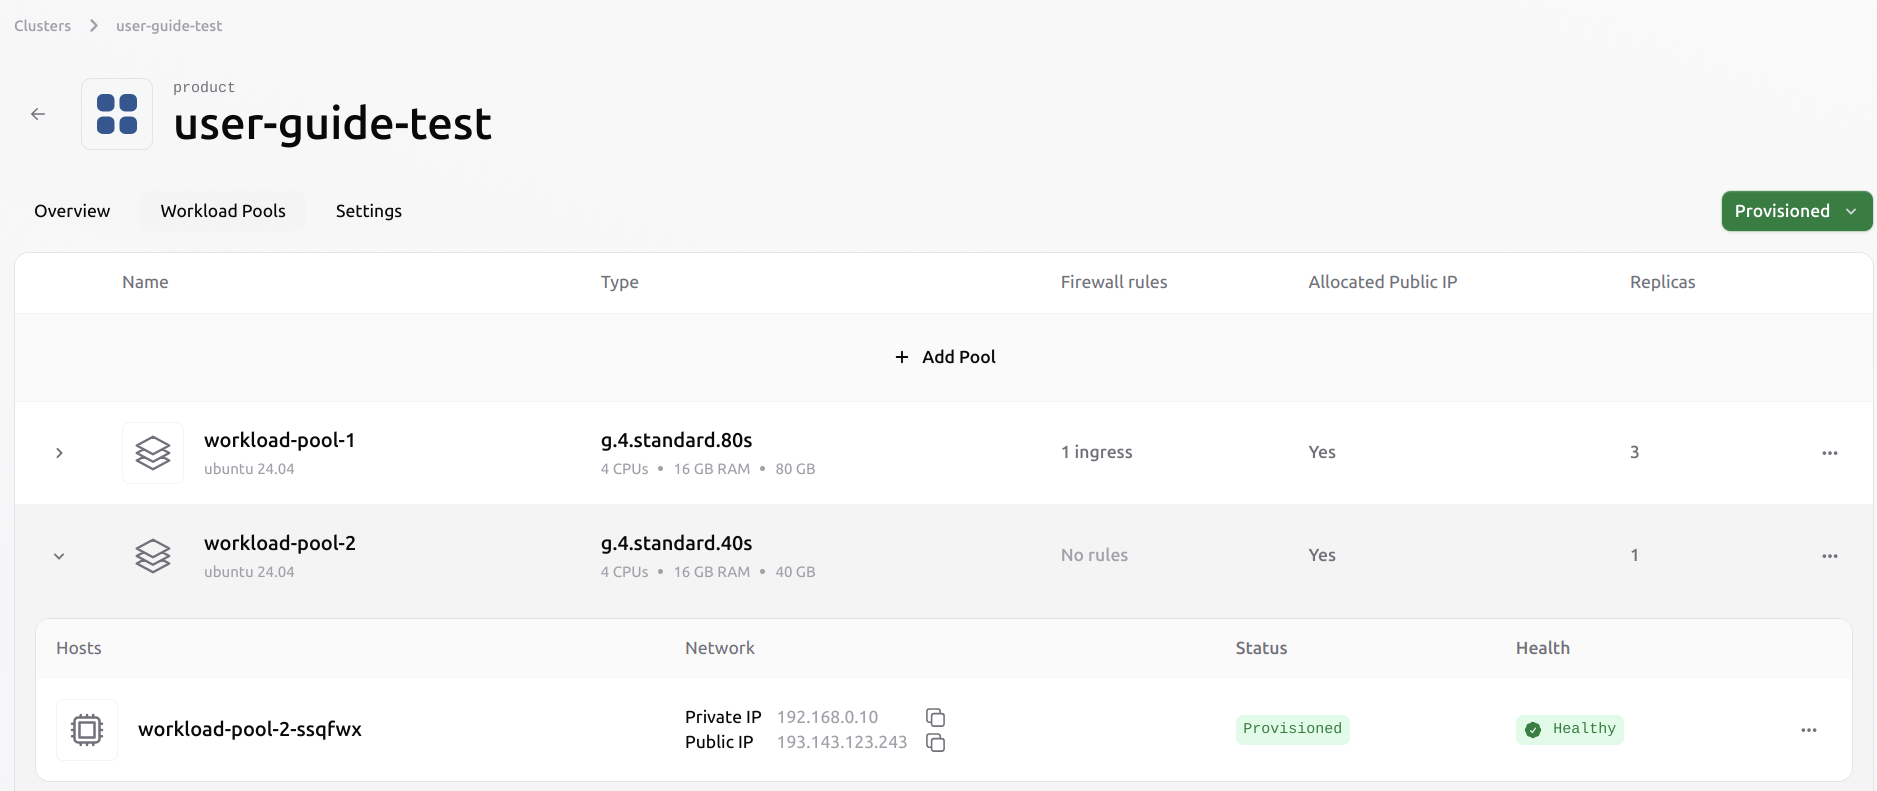
Once inside the cluster, open the **Workload Pools** tab.
Use the **“+ Add Pool”** button to start a new pool configuration.
## Create a new pool on the existing cluster
Once inside the cluster, open the **Workload Pools** tab.
Use the **“+ Add Pool”** button to start a new pool configuration.
 Once you are in the cluster, use the **“+ Add Workload Pool”** button to start the new pool configuration.
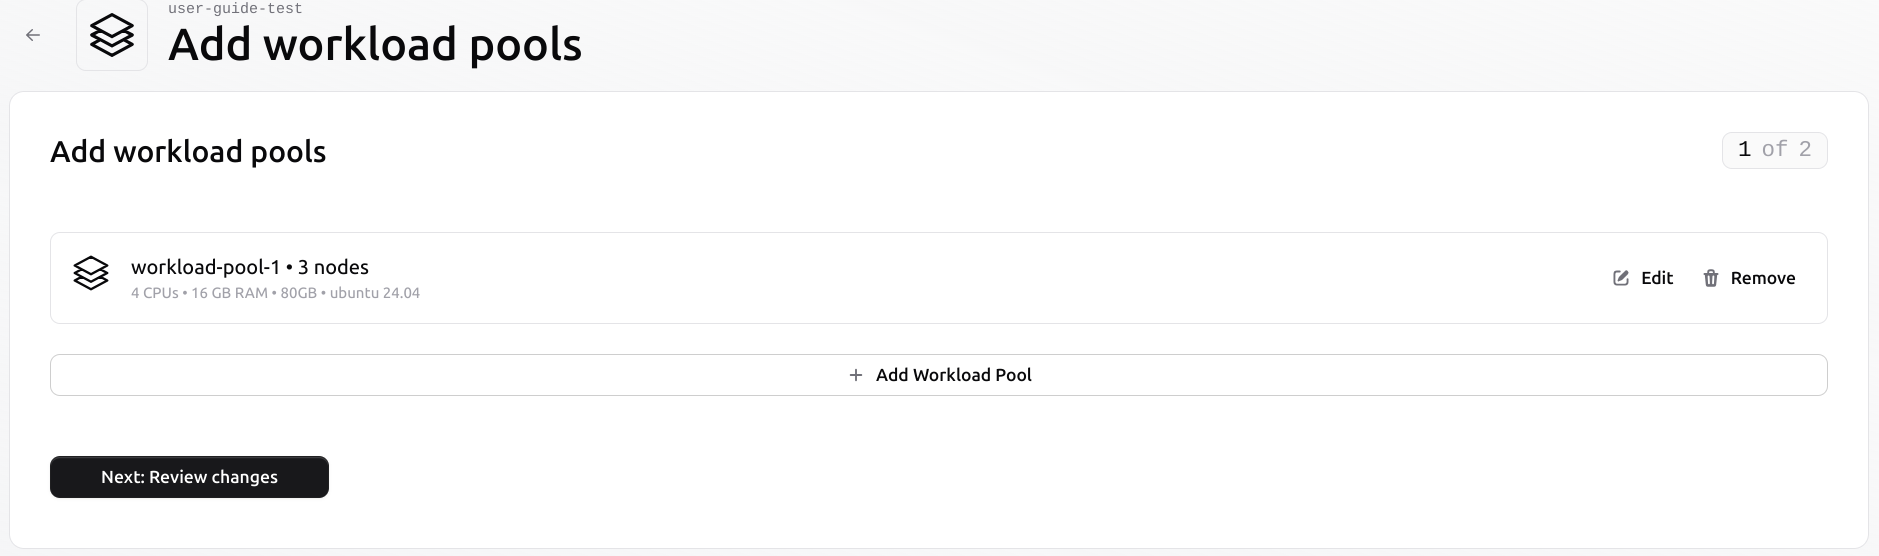 Define the name, base image, instance type, replica count, and any required firewall rules, following the steps outlined in the **Cluster Provisioning** section. Finalise by selecting **Create**. The new pool will appear in the list as provisioned.
 ## Evicting a VM from an existing pool
It is possible to evict a Virtual Machine from an existing pool. This process does not automatically migrate any existing workloads from the evicted VM to other Virtual Machines in the pool. The user has to manage the workload before eviction manually.
Select the VM to evict from the pool by clicking the three dots on the right.
## Evicting a VM from an existing pool
It is possible to evict a Virtual Machine from an existing pool. This process does not automatically migrate any existing workloads from the evicted VM to other Virtual Machines in the pool. The user has to manage the workload before eviction manually.
Select the VM to evict from the pool by clicking the three dots on the right.
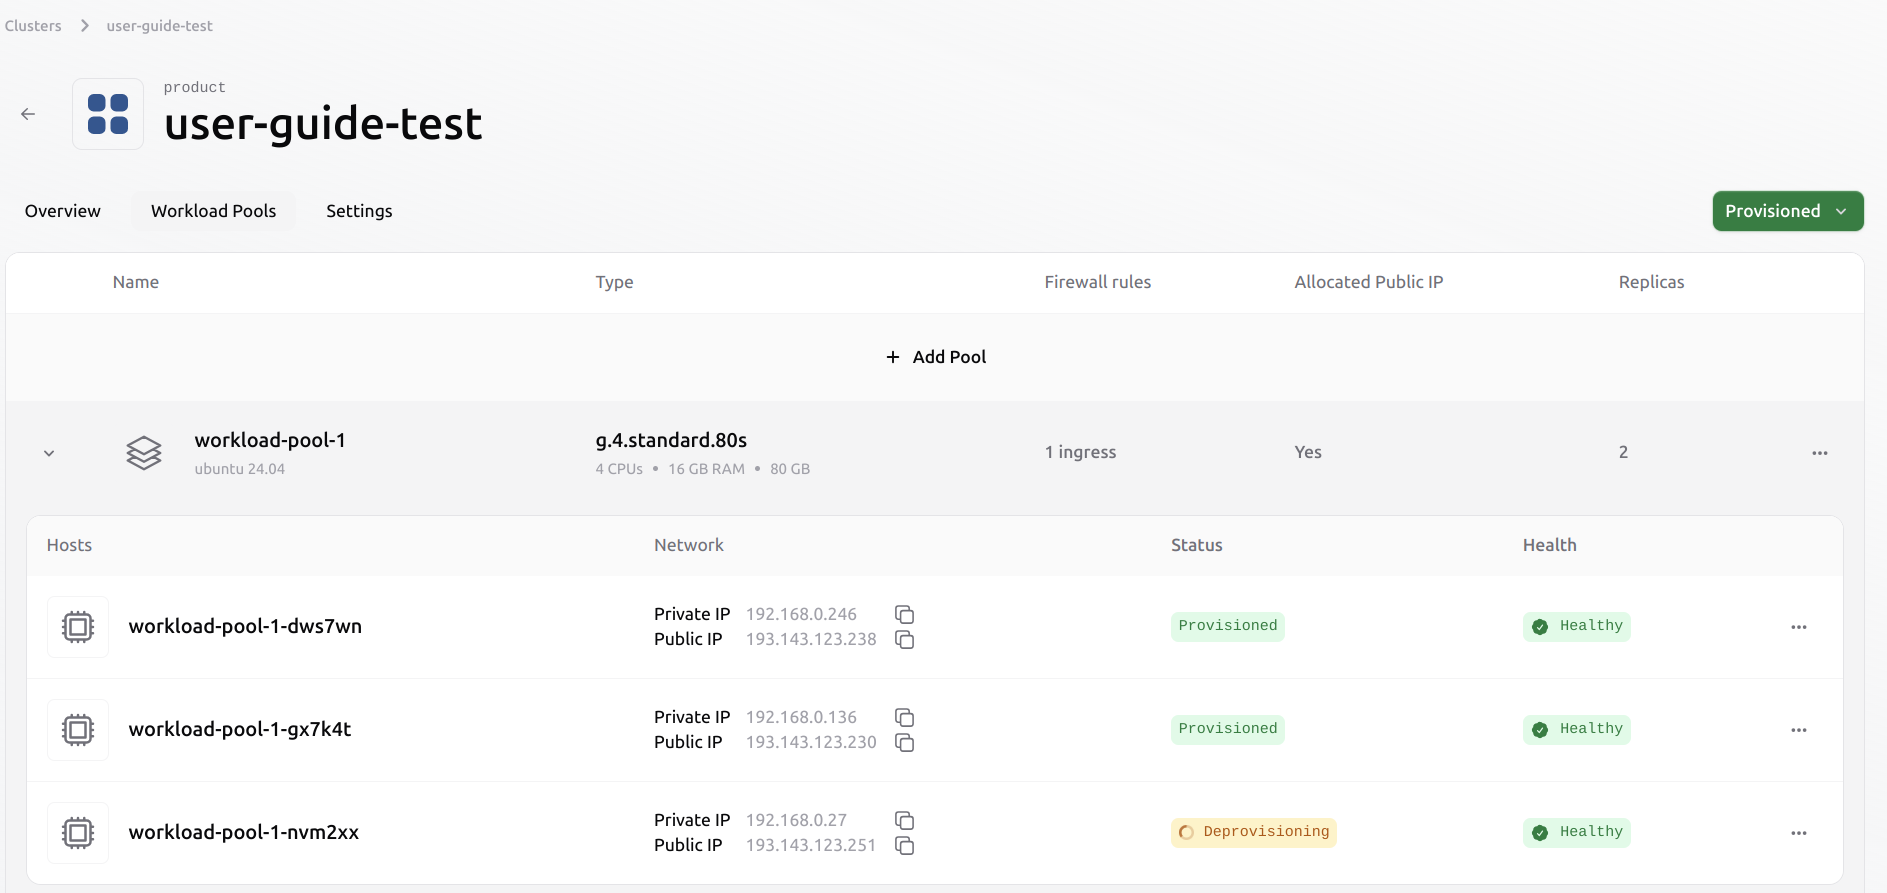
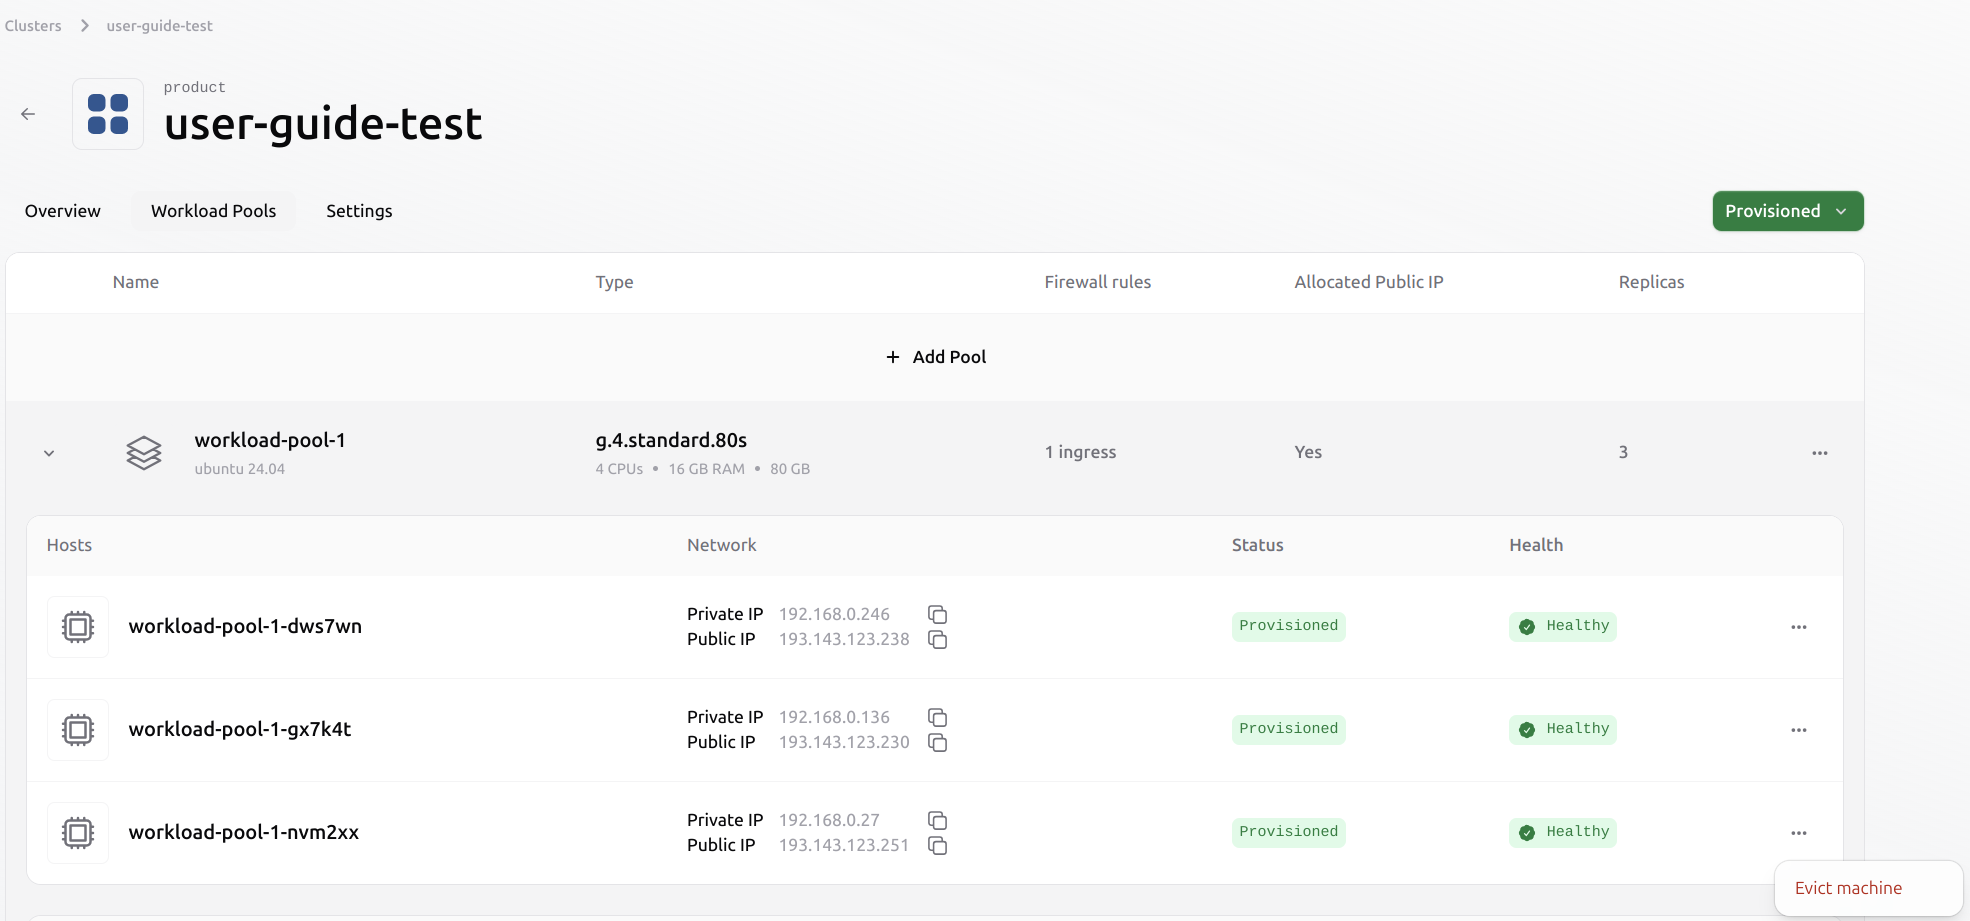 After a short while, the VM will be removed from the pool, its resources returned to the available resource pool, and any public IP associated with the VM will be released. This process will also delete any data stored on ephemeral storage. To retain data, persistent storage must be configured separately.
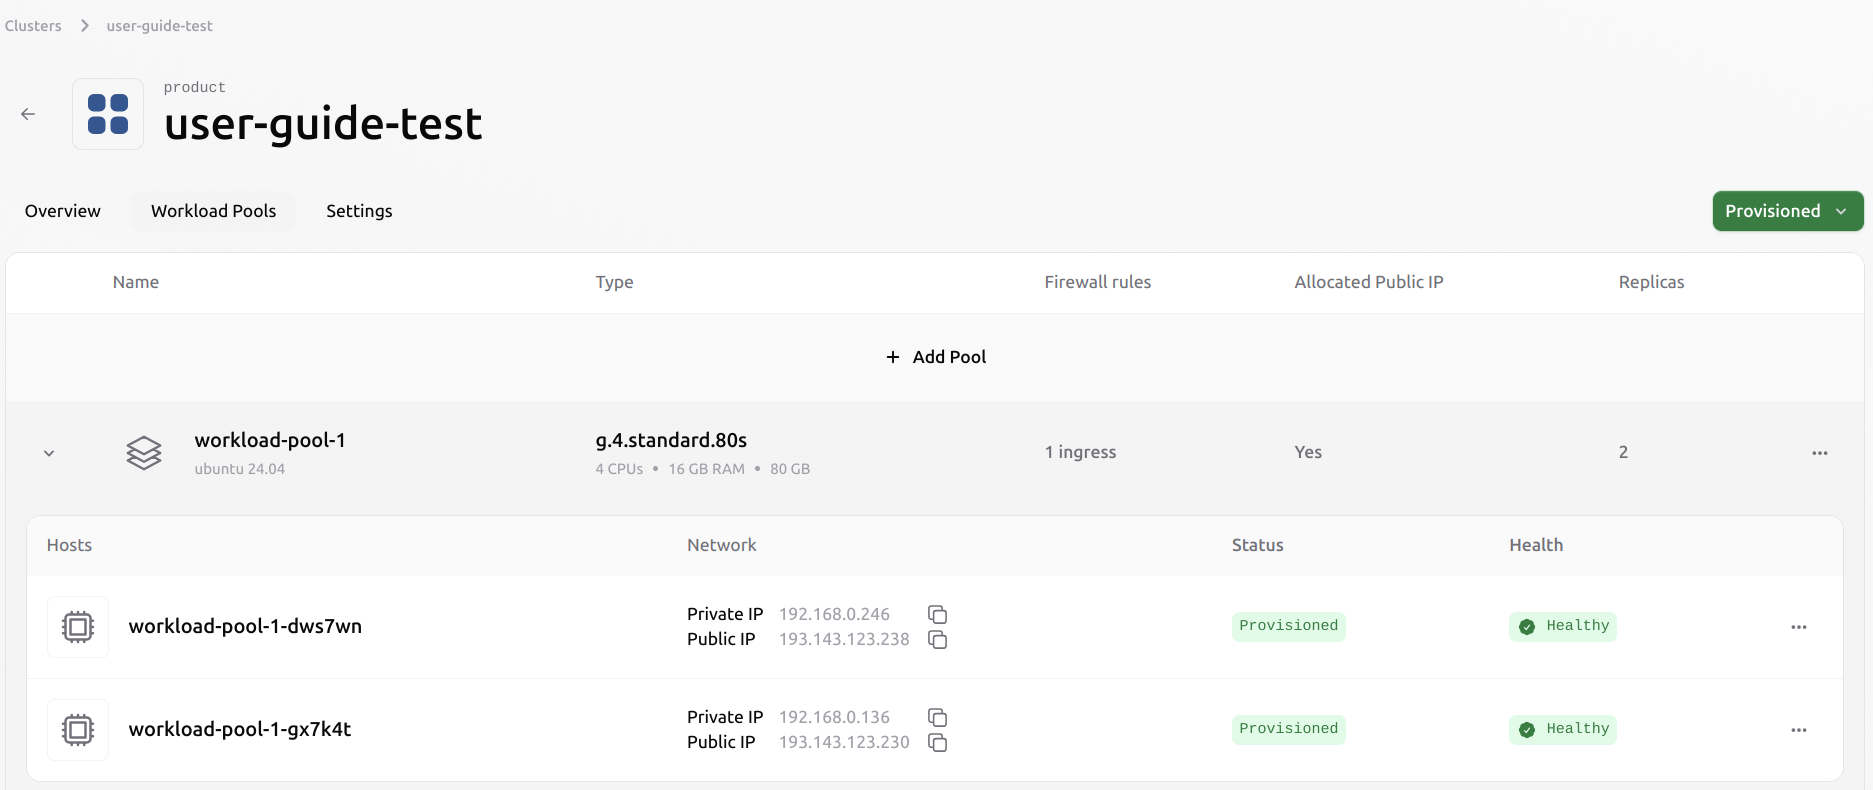
 The pool should now show that only 3 Virtual Machines remain active out of the 3 originally in the pool.
 ## Deleting a pool from an existing cluster
This process operates at a higher level than deleting a single VM. The user does not need to evict the VMs individually. Once the pool is deleted, all VMs within it will also be evicted automatically. All associated resources, including ephemeral data and public IPs, will be released from the cluster. Users must ensure that any data they wish to retain is saved to persistent volumes beforehand.
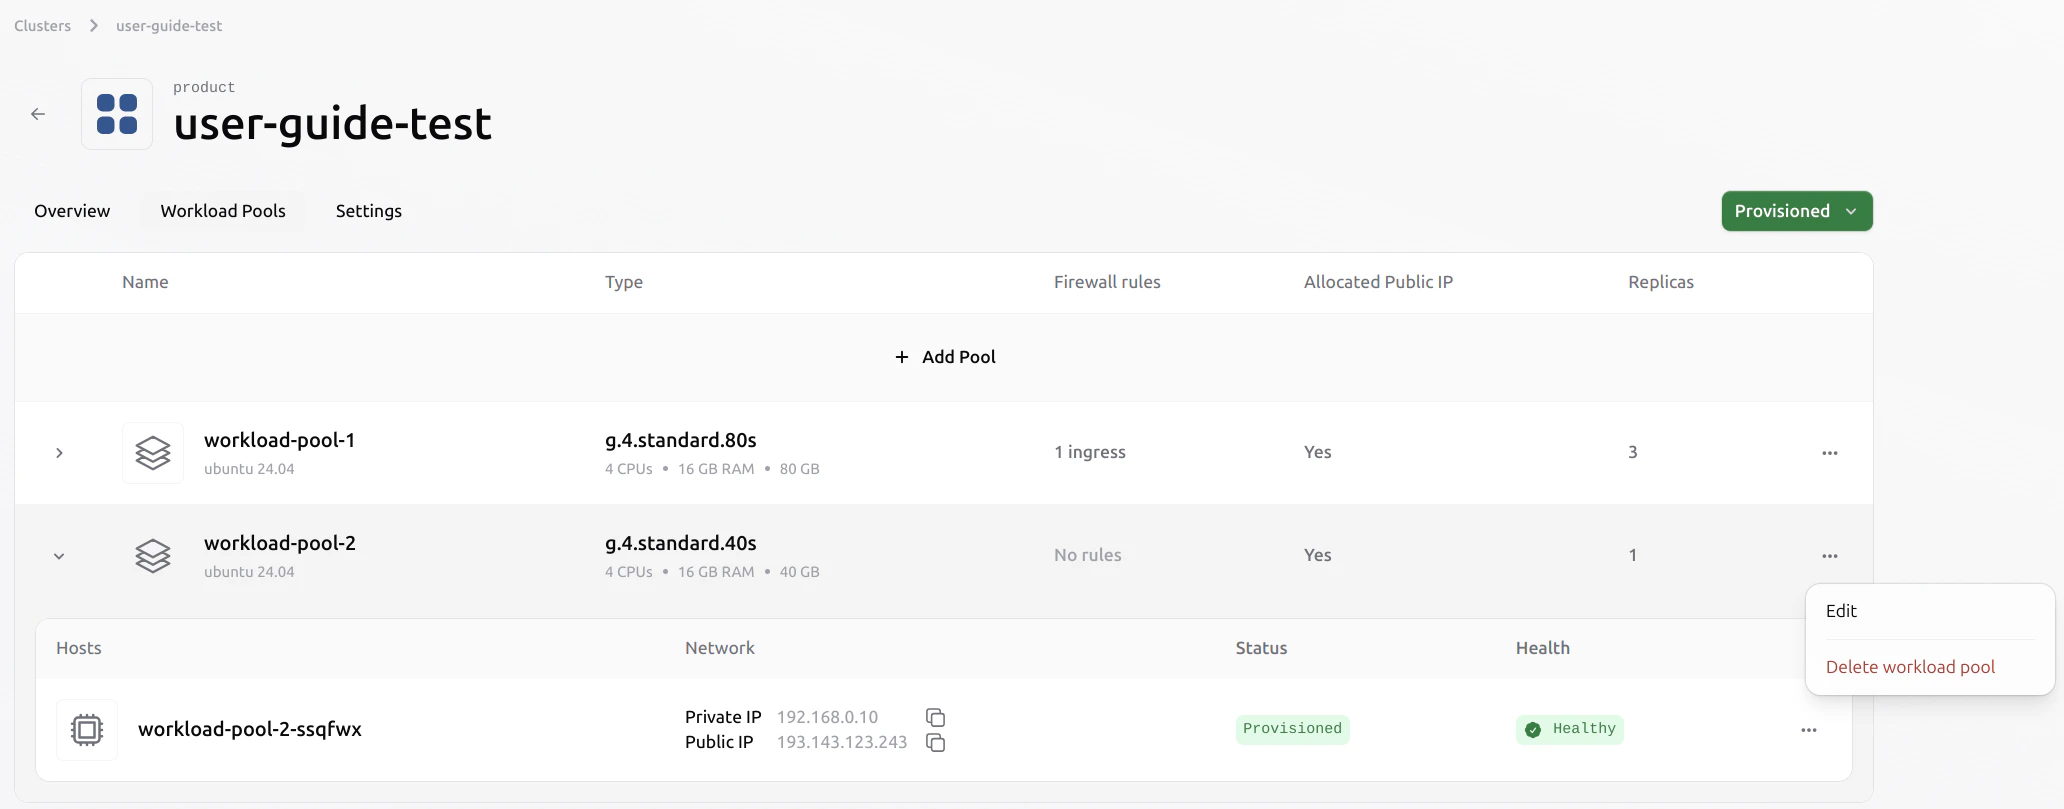
Select the pool you want to delete. Click the three-dot menu on the right and choose **Delete Pool**.
## Deleting a pool from an existing cluster
This process operates at a higher level than deleting a single VM. The user does not need to evict the VMs individually. Once the pool is deleted, all VMs within it will also be evicted automatically. All associated resources, including ephemeral data and public IPs, will be released from the cluster. Users must ensure that any data they wish to retain is saved to persistent volumes beforehand.
Select the pool you want to delete. Click the three-dot menu on the right and choose **Delete Pool**.
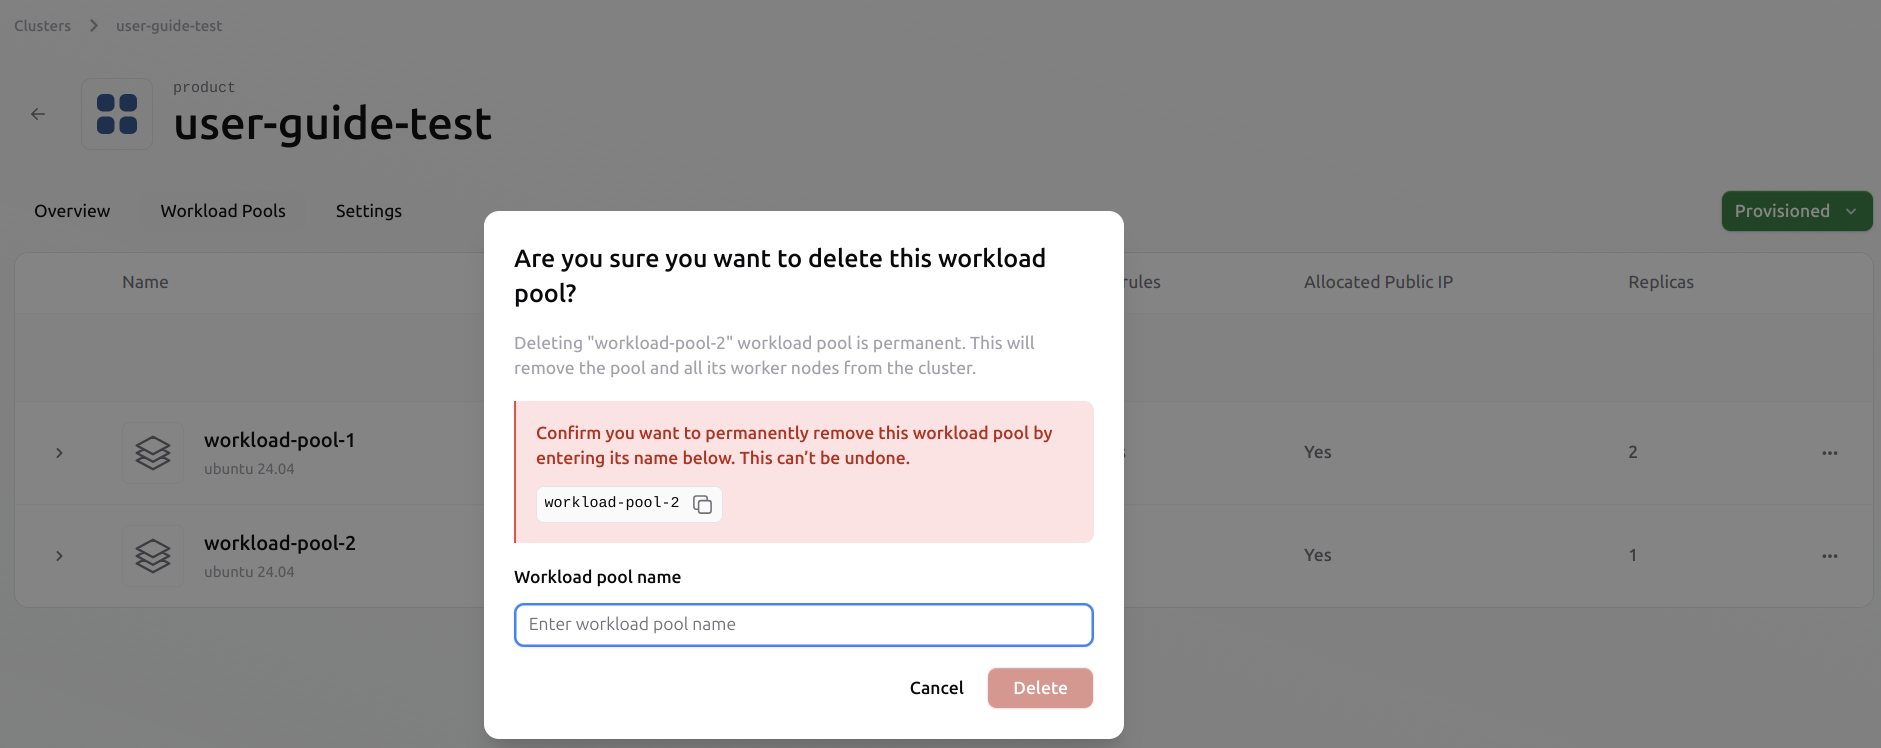
 To confirm the delete operation, enter the name of the pool in the confirmation panel.
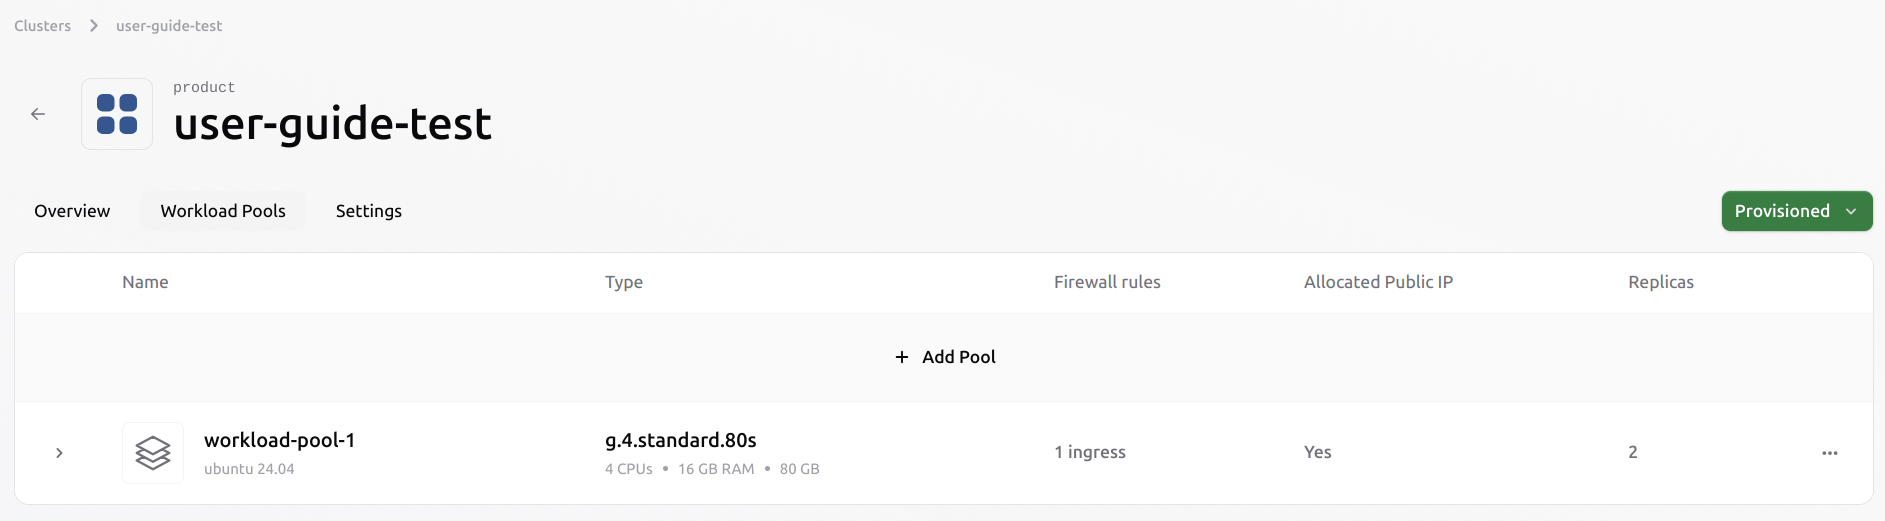
 The selected pool is not part of the cluster.
 ## Delete a cluster
The cluster `user-guide-test` contains one or more workload pools with running Virtual Machines. Before initiating the deletion process, ensure that any data that needs to persist is stored in a persistent volume. Ephemeral data will be permanently deleted.
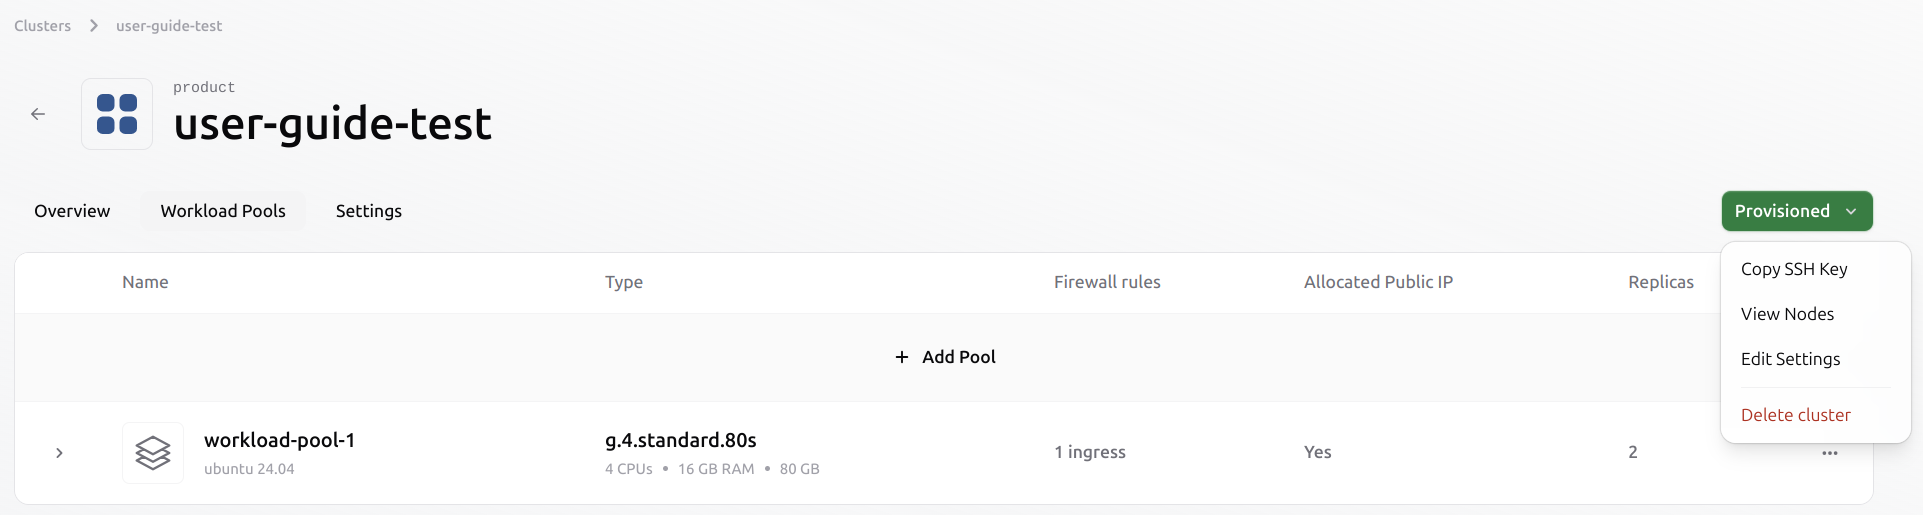
In the **Workload Pools** tab, click the green **Provisioned** button in the top-right corner of the cluster view.\
Select **Delete cluster** from the dropdown menu to begin the deletion process.
## Delete a cluster
The cluster `user-guide-test` contains one or more workload pools with running Virtual Machines. Before initiating the deletion process, ensure that any data that needs to persist is stored in a persistent volume. Ephemeral data will be permanently deleted.
In the **Workload Pools** tab, click the green **Provisioned** button in the top-right corner of the cluster view.\
Select **Delete cluster** from the dropdown menu to begin the deletion process.
 Deleting a cluster will **permanently remove all resources associated with it**, including:
* All workload pools
* All Virtual Machines
* Any ephemeral storage
* Any assigned public IPs\
All resources will be evicted and released back to the shared resource pool.
A confirmation panel appears. To confirm the operation, enter the name of the cluster in the dialogue box.
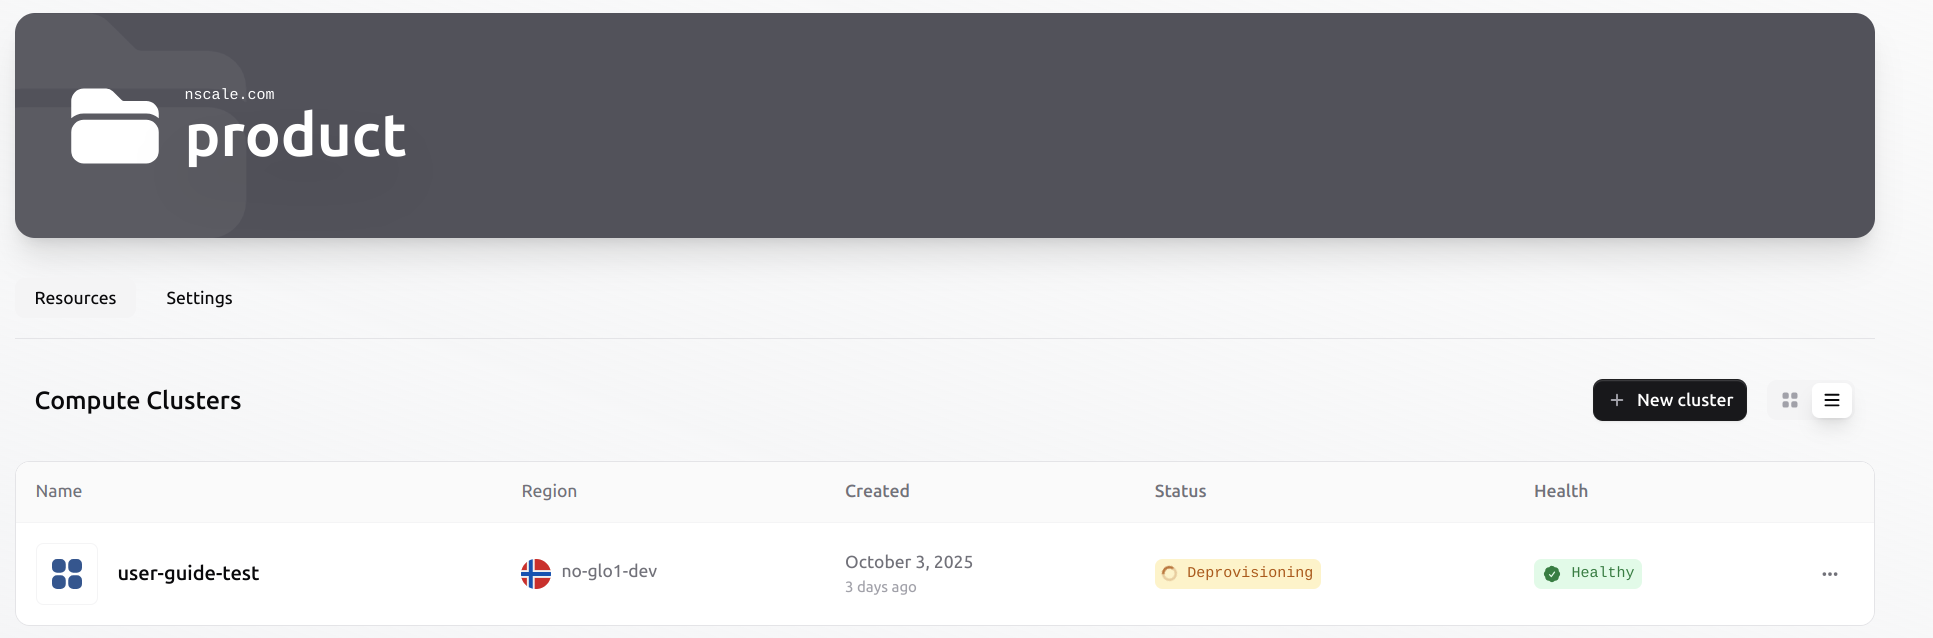
Once the deletion is initiated, the cluster status changes to **Deprovisioning**.\
When the process completes, the cluster is removed from the **Compute Clusters** list and all associated resources are fully deallocated.
Deleting a cluster will **permanently remove all resources associated with it**, including:
* All workload pools
* All Virtual Machines
* Any ephemeral storage
* Any assigned public IPs\
All resources will be evicted and released back to the shared resource pool.
A confirmation panel appears. To confirm the operation, enter the name of the cluster in the dialogue box.
Once the deletion is initiated, the cluster status changes to **Deprovisioning**.\
When the process completes, the cluster is removed from the **Compute Clusters** list and all associated resources are fully deallocated.