> ## Documentation Index
> Fetch the complete documentation index at: https://docs.nscale.com/llms.txt
> Use this file to discover all available pages before exploring further.
# Deploy a model
> Run a model in your environment and call it with an OpenAI-compatible endpoint.
**Beta:** Deploying models into [Environments](/docs/platform-services/environments) is in beta for **private cloud** organizations. To join the waitlist, contact [support](mailto:helpdesk@nscale.com).
A **deployment** is something you run inside one environment. Deploying a model from the console sets up two things in the environment:
* **The model**, which serves an **endpoint**: a URL you send requests to. It works with the OpenAI API format.
* **A secret**, which stores the **access key** that lets you call the endpoint.
The console lists them together as one deployment.
## What it does
* **Dedicated hardware.** The model runs on your environment cluster. No other customer shares it.
* **OpenAI-compatible endpoint.** OpenAI SDKs and tools work with it.
* **Multiple deployments.** You can deploy the same model to several environments, for example `dev` and `prod`.
## Key words
| Word | Meaning |
| - | - |
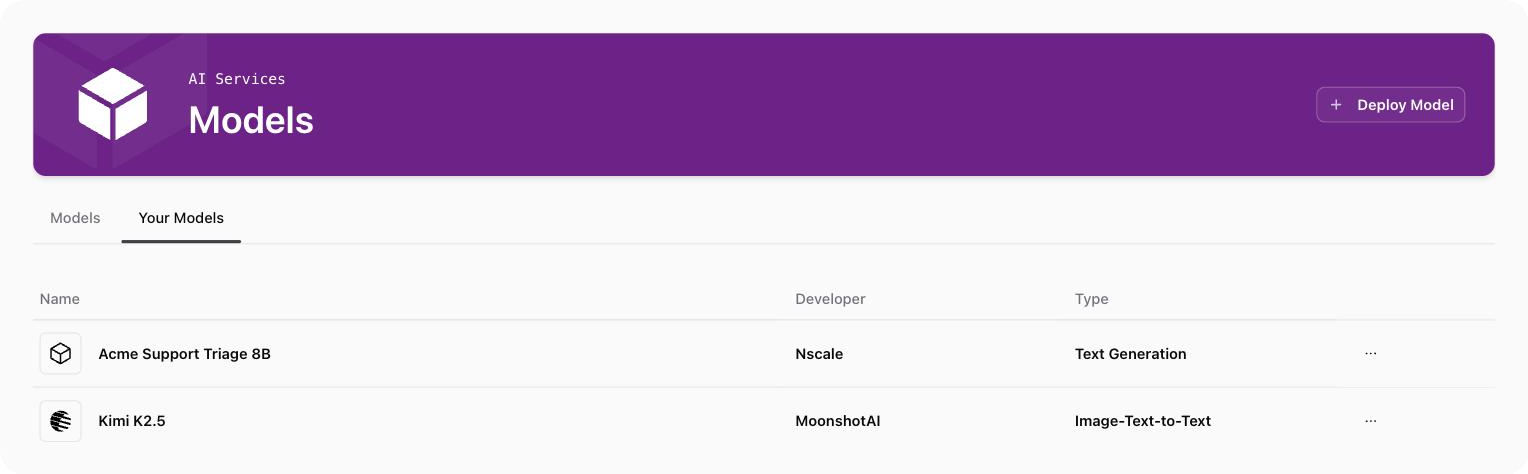
| **Model** | The AI model you want to run. The **Models** tab lists Nscale's models. The **Your Models** tab lists your project's own models. |
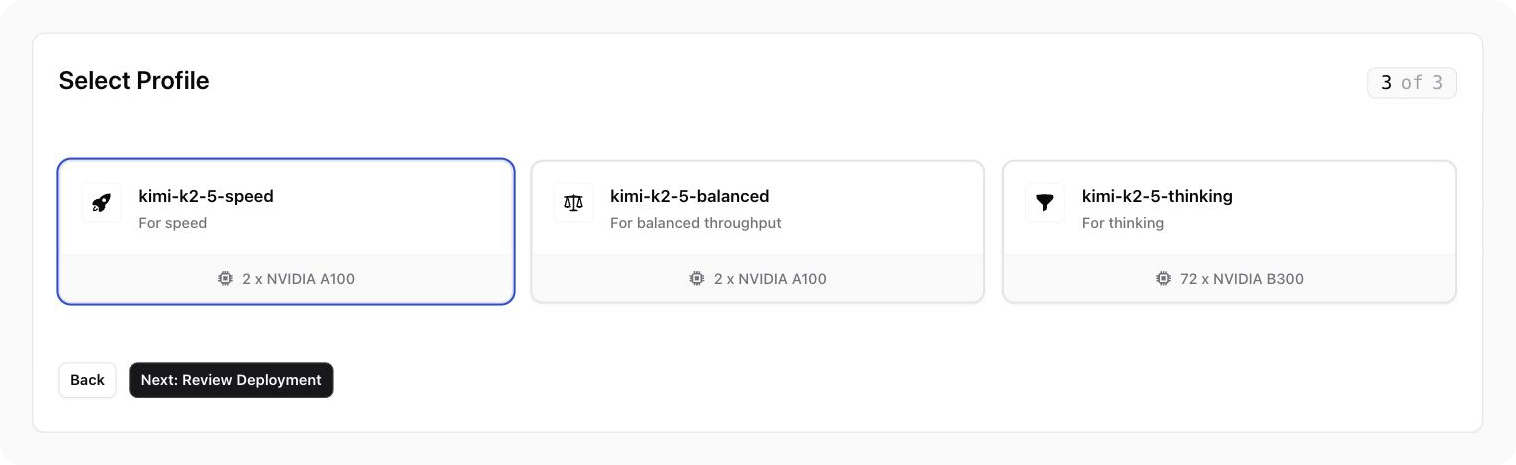
| **Profile** | A ready-made setup for deploying a model. It decides the hardware and tuning. |
| **Environment** | Where the model runs. It must be **Ready**. |
**Profile types:**
* **Balanced**: a good mix of speed and cost
* **Latency-optimized**: faster replies for each request
* **Throughput-optimized**: handles more requests at once
* **Custom**: a special setup made for a specific need
## Before you start
You need an [environment](/docs/platform-services/environments#environments) with the status **Ready**.
## Deploy a model
Go to **AI Services → Models**. Click **+ Deploy Model**.
You can also start from:
* A model's page: click **Deploy**
* An environment: click **⋯**, then **Deploy Model**
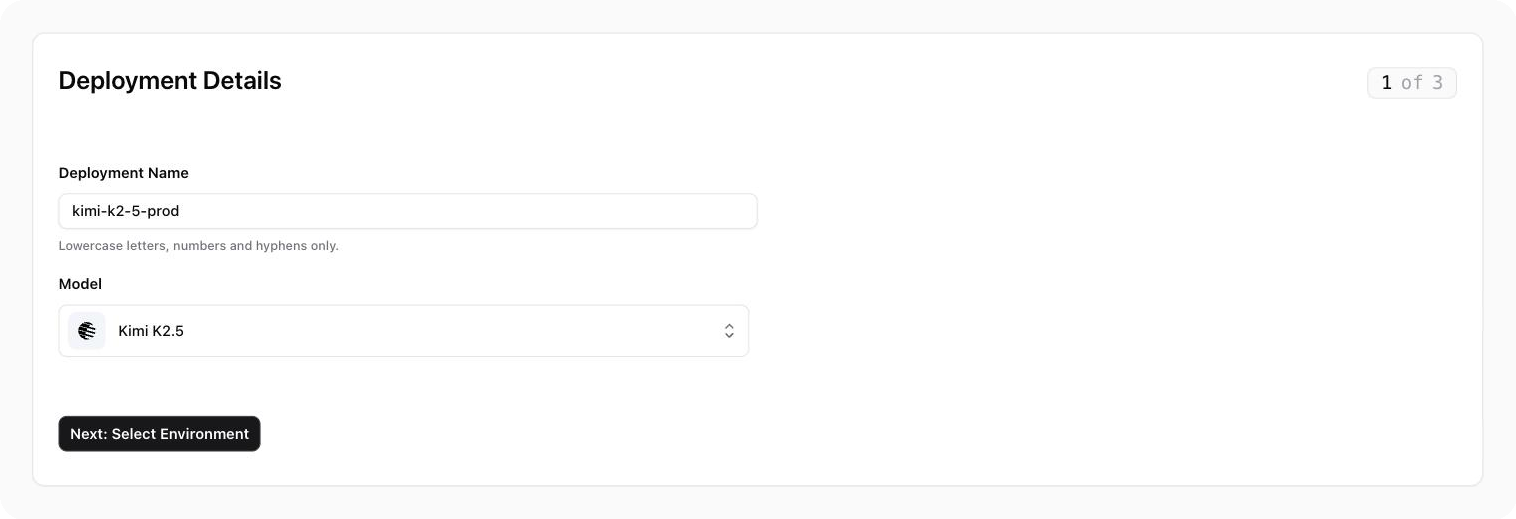
 Under **Deployment Details**:
* **Deployment Name**: lowercase letters, numbers, and dashes. Up to 62 characters. Must be unique for this model.
* **Model**: search for and select the model.
Under **Deployment Details**:
* **Deployment Name**: lowercase letters, numbers, and dashes. Up to 62 characters. Must be unique for this model.
* **Model**: search for and select the model.
 Under **Select Environment**, pick where the model runs. Only **Ready** environments show in the list.
No environment yet? Click **+ Create Environment**. It opens in a new tab.
Under **Select Profile**, pick a profile.
Each profile card shows the hardware it needs. The console checks this against your environment's cluster.
If a card says **No matching hardware in this environment**, the cluster doesn't have the right GPUs. Pick another profile, or use an environment on a different cluster.
Under **Select Environment**, pick where the model runs. Only **Ready** environments show in the list.
No environment yet? Click **+ Create Environment**. It opens in a new tab.
Under **Select Profile**, pick a profile.
Each profile card shows the hardware it needs. The console checks this against your environment's cluster.
If a card says **No matching hardware in this environment**, the cluster doesn't have the right GPUs. Pick another profile, or use an environment on a different cluster.
 Check the **Review your Deployment** summary. Click **Create Deployment**.
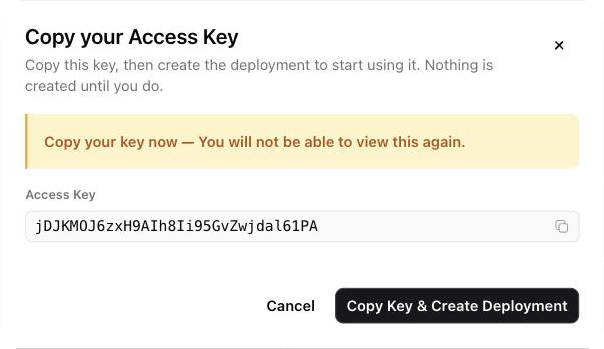
A **Copy your Access Key** window opens. It shows a new access key.
**Copy the key now. You can't see it again.** Store it in a password manager or secrets store.
Click **Copy Key & Create Deployment**. This copies the key and starts the deployment. Nothing is created until you click it.
Check the **Review your Deployment** summary. Click **Create Deployment**.
A **Copy your Access Key** window opens. It shows a new access key.
**Copy the key now. You can't see it again.** Store it in a password manager or secrets store.
Click **Copy Key & Create Deployment**. This copies the key and starts the deployment. Nothing is created until you click it.
 **What happens next:** The console opens the model's **Deployments** tab. Your deployment shows **Deploying**. When it shows **Running**, you can call it.
Large models take longer to download and start. You can leave the page.
## Deployment status
| Status | What it means | What to do |
| - | - | - |
| **Deploying** | The model is being set up | Wait |
| **Running** | The model is ready | Call the endpoint |
| **Undeploying** | The deployment is being removed | Wait |
| **Failed** | The deployment didn't work | Hover the status to see why. Fix the cause, then [delete the deployment](#delete-a-deployment) and deploy it again |
| **Cancelled** | The deployment was stopped | Deploy again if needed |
The environment's **Deployments** tab uses different words for the same status: **Pending**, **In progress**, **Succeeded**, **Failed**, and **Cancelled**.
## Call your model
1. Open the model's page and go to **Overview**.
2. Find the **Access endpoint** card. If you have more than one deployment, pick one from the menu at the top of the card.
3. Copy the example in **cURL**, **Python**, or **TypeScript**.
You can also copy the **Endpoint** from the **Deployments** tab.
**What happens next:** The console opens the model's **Deployments** tab. Your deployment shows **Deploying**. When it shows **Running**, you can call it.
Large models take longer to download and start. You can leave the page.
## Deployment status
| Status | What it means | What to do |
| - | - | - |
| **Deploying** | The model is being set up | Wait |
| **Running** | The model is ready | Call the endpoint |
| **Undeploying** | The deployment is being removed | Wait |
| **Failed** | The deployment didn't work | Hover the status to see why. Fix the cause, then [delete the deployment](#delete-a-deployment) and deploy it again |
| **Cancelled** | The deployment was stopped | Deploy again if needed |
The environment's **Deployments** tab uses different words for the same status: **Pending**, **In progress**, **Succeeded**, **Failed**, and **Cancelled**.
## Call your model
1. Open the model's page and go to **Overview**.
2. Find the **Access endpoint** card. If you have more than one deployment, pick one from the menu at the top of the card.
3. Copy the example in **cURL**, **Python**, or **TypeScript**.
You can also copy the **Endpoint** from the **Deployments** tab.
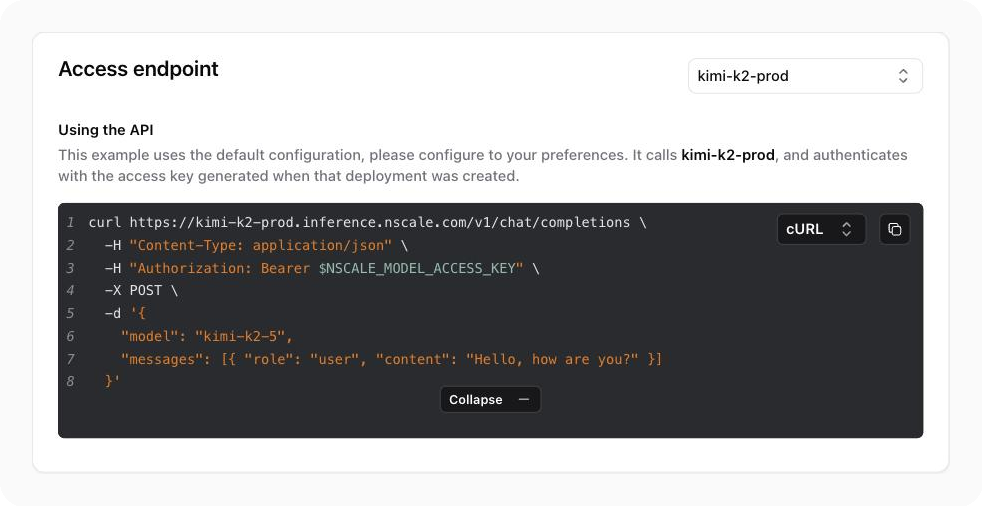 Example request:
```bash theme={null}
export NSCALE_MODEL_ACCESS_KEY=""
curl "/chat/completions" \
-H "Authorization: Bearer $NSCALE_MODEL_ACCESS_KEY" \
-H "Content-Type: application/json" \
-d '{
"model": "",
"messages": [{"role": "user", "content": "Hello!"}]
}'
```
Replace:
* `` with the **Endpoint** from the console
* `` with the key you copied
* `` with the model name shown on the model page
## Lost your access key? Roll it
You can't view an access key again. If you lose it, create a new one.
1. Open the model's **Deployments** tab.
2. Click **Roll Key** on the deployment.
3. Copy the new key. Click **Copy Key & Redeploy**.
The deployment restarts with the new key. **The old key stops working.** Update any app that uses it.
**Roll Key** is not available for profiles that support more than one hardware type. For these, delete the deployment and deploy again.
## Delete a deployment
**The endpoint stops working straight away.** Any app that calls it will fail.
1. Open the model's **Deployments** tab.
2. Click **⋯** on the deployment. Click **Delete Deployment**.
3. Confirm.
You can't delete a deployment while it is **Deploying** or **Undeploying**.
Example request:
```bash theme={null}
export NSCALE_MODEL_ACCESS_KEY=""
curl "/chat/completions" \
-H "Authorization: Bearer $NSCALE_MODEL_ACCESS_KEY" \
-H "Content-Type: application/json" \
-d '{
"model": "",
"messages": [{"role": "user", "content": "Hello!"}]
}'
```
Replace:
* `` with the **Endpoint** from the console
* `` with the key you copied
* `` with the model name shown on the model page
## Lost your access key? Roll it
You can't view an access key again. If you lose it, create a new one.
1. Open the model's **Deployments** tab.
2. Click **Roll Key** on the deployment.
3. Copy the new key. Click **Copy Key & Redeploy**.
The deployment restarts with the new key. **The old key stops working.** Update any app that uses it.
**Roll Key** is not available for profiles that support more than one hardware type. For these, delete the deployment and deploy again.
## Delete a deployment
**The endpoint stops working straight away.** Any app that calls it will fail.
1. Open the model's **Deployments** tab.
2. Click **⋯** on the deployment. Click **Delete Deployment**.
3. Confirm.
You can't delete a deployment while it is **Deploying** or **Undeploying**.