

Prerequisites: You need a VPC network and at least one instance or cluster in the same VPC before you can use the filesystem.
Summary
This page explains how to create and use Filesystem storage in the nscale console. By following the steps, you will:- Create a project-scoped, region-bound shared filesystem
- Attach the filesystem to one or more networks so instances and clusters in those networks can share it
- Configure root access, extended POSIX ACL support, and access-time (
atime) update behavior - Define snapshot policies to automate point-in-time filesystem snapshots
- Retrieve the NFS mount command and use it to mount the filesystem from your compute resources
Availability
This feature is currently only available for the reserved cloud service environment.Multiple network attachments: A filesystem can be attached to more than one VPC in its region. Each attachment gets its own mount source. To stop a VPC from using the filesystem, remove it from the filesystem’s Associated VPCs.
Requirements
- Permissions to create and manage storage resources in the console
- A target region selected for the storage resource (Filesystem is region-bound)
- One or more networks in the same region to attach the storage to
- At least one instance or cluster in the same network where you will mount the filesystem
If no VPC is selected, the mount command is not provided. You must select a VPC to get the mount command.
Filesystem lifecycle
NFS settings
Use the NFS settings when creating or editing a filesystem to control root access, extended POSIX ACL support, and read-driven access-time updates.
Set
atime update interval (seconds) to 0 to disable read-driven atime updates. A positive whole number updates atime during a read only when the existing value is older than the configured number of seconds. The accepted range is 0 through 86,399,999,999,999 seconds.
Snapshot policies
Snapshot policies automate filesystem snapshots on a recurring schedule. Nscale enables Default Snapshot Protection by default, and you can add up to 4 snapshot policies with custom schedules and retention.Default Snapshot Protection is platform-managed. It runs daily at
04:00Z, keeps the last 7 snapshots, and is controlled separately from user-managed snapshot policies.Schedule options
All snapshot policy times are in UTC and useHH:MMZ format, for example 04:00Z.
The retention value,
keep, is the number of snapshots to retain and must be at least 1.
When updating policies through the API, policy names are identity keys. Changing a policy name creates a new policy and removes the old one.
API behavior
Default Snapshot Protection is managed withspec.defaultSnapshotProtectionEnabled. User-managed snapshot policies are managed inline on the filesystem resource as spec.snapshotPolicies.
Public API reads return user-managed snapshot policies only. The platform-managed Default Snapshot Protection policy is not included in
spec.snapshotPolicies or status.snapshotPolicies.
Omit snapshotPolicies when you do not want to change user-managed policies. Do not send null.
Example user-managed policy list:
Step-by-step
- Choose the project and region
- In the Console, select the project you want to use under All Projects
- Select the region where you want the filesystem to live
- Create (or select) the network you will attach storage to
- Create a new network, or select an existing one in the same region
- Confirm the network is in the same region as the storage you plan to create
- You can attach the filesystem to more than one network in the same region
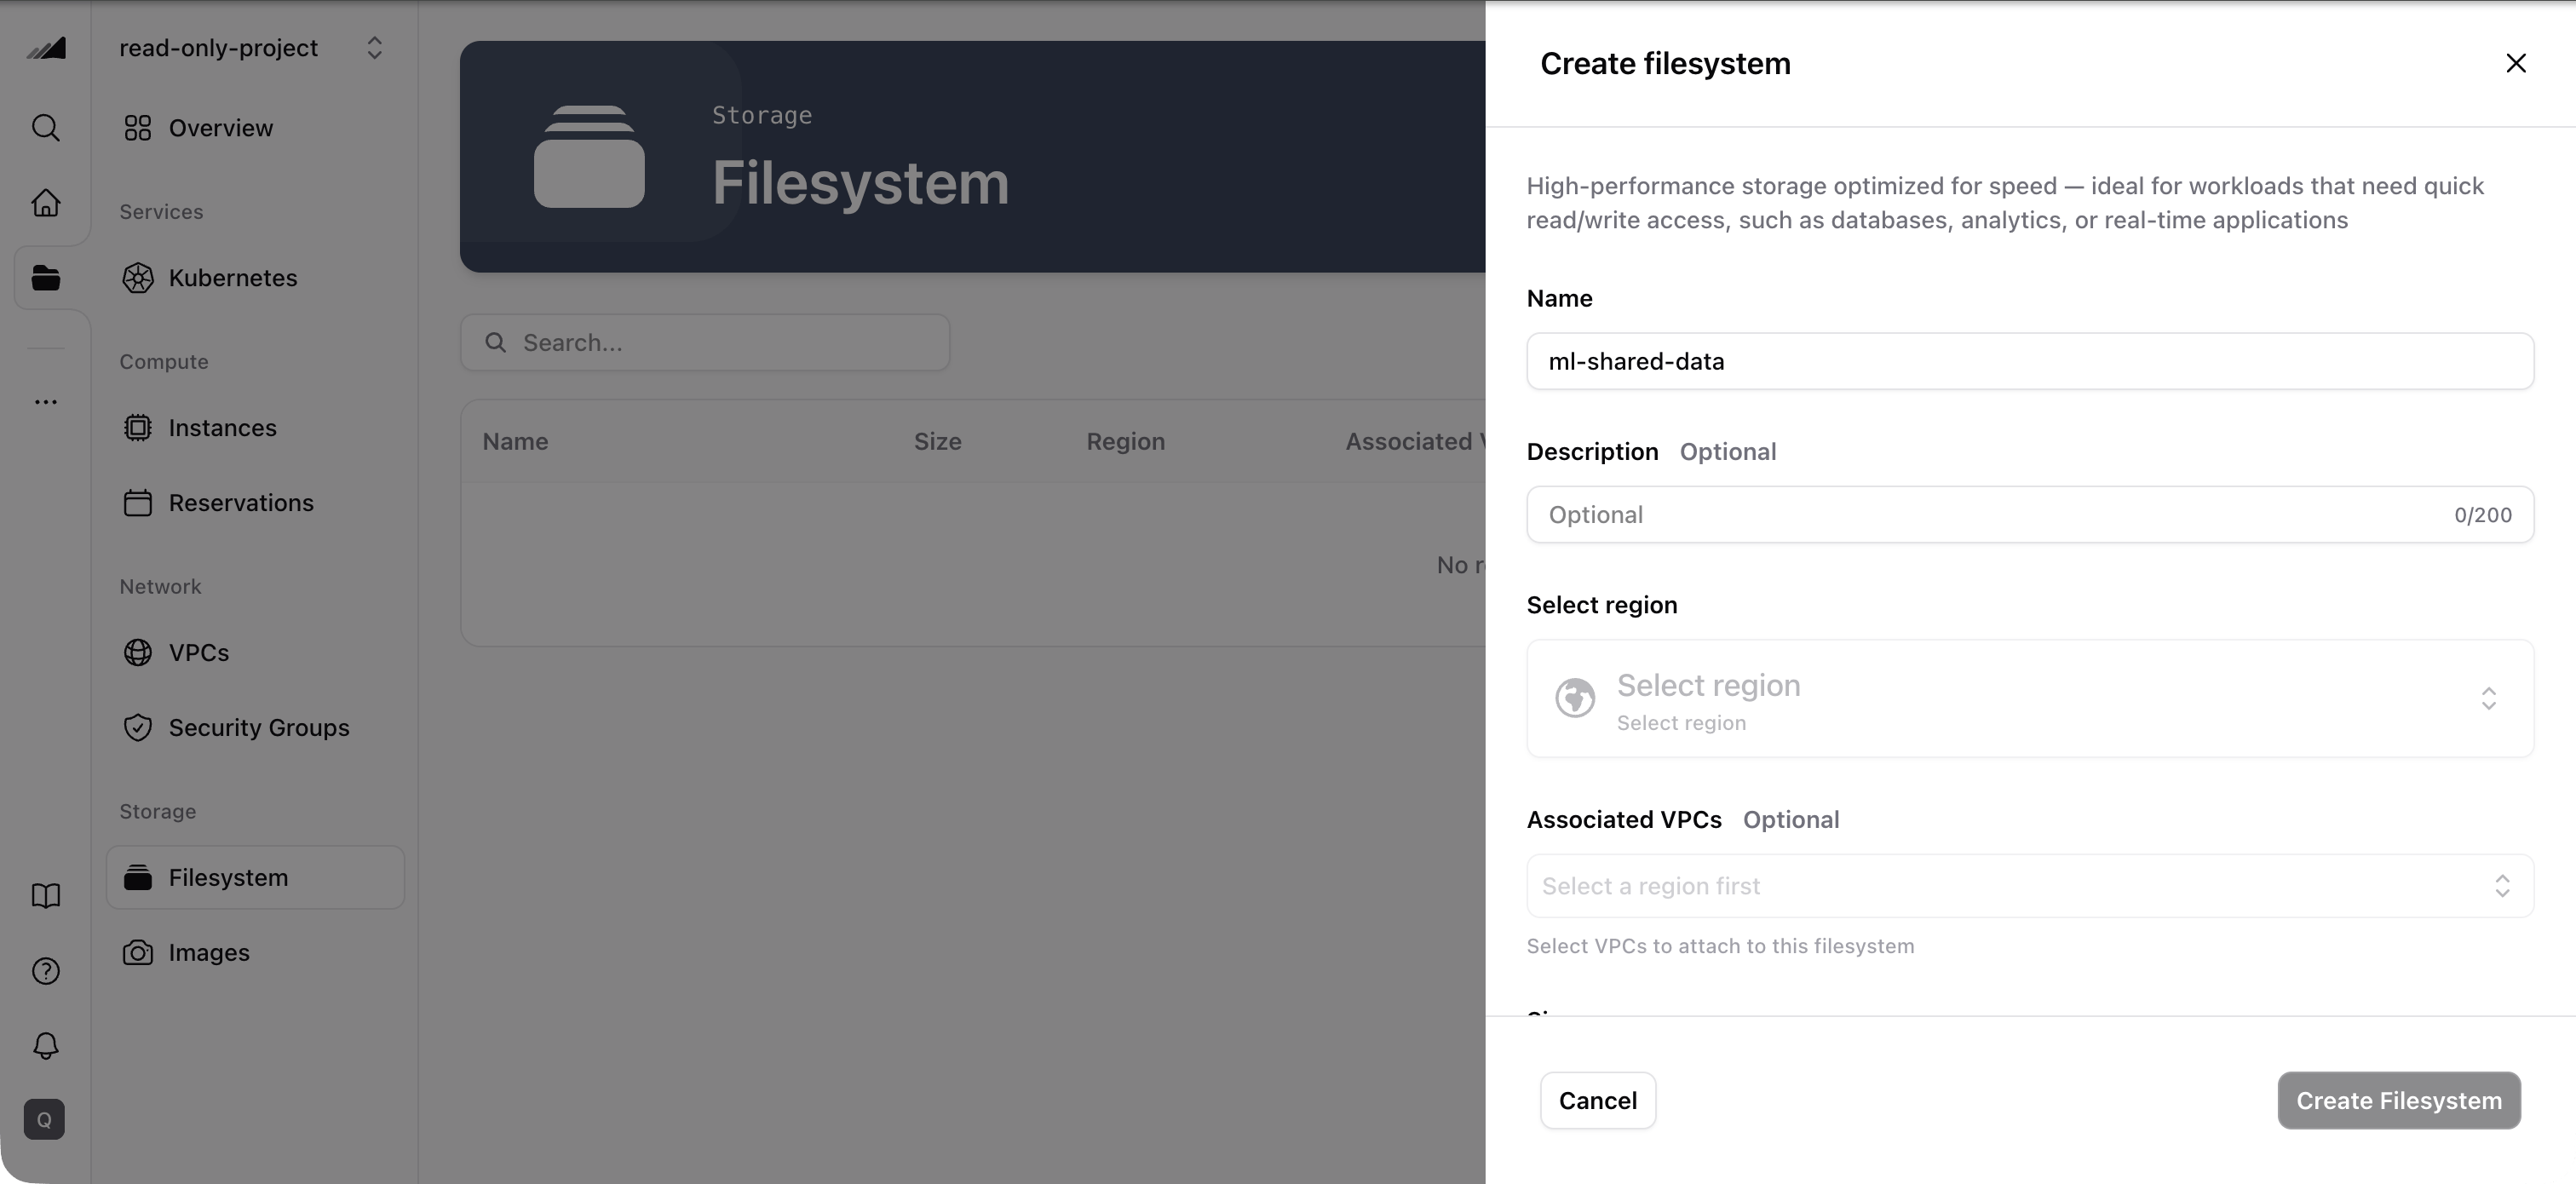
- Create the Filesystem
- Go to Storage → Filesystem in the console
- Provide the required values (for example: name and capacity)
- Configure Root squash, POSIX ACLs, and
atimeupdate interval (seconds) under the NFS settings - Create the filesystem
- You should see the filesystem appear in the resource list, and its status move to a “ready/available” state
- Configure snapshot policies (optional)
- Use the Snapshot policies section when creating or editing the filesystem
- Review Default Snapshot Protection, which is enabled by default
- Add user-managed policies if you need additional cadences, UTC schedules, or retention rules
- Save the filesystem and verify each user-managed policy reaches a ready/provisioned state
- Get the NFS mount command
- In the filesystem details, locate the action or section to Mount your filesystem
- Copy the NFS mount command
- You should see a mount command that you can run from a Linux host in the attached network
- Mount from your compute (instance or cluster)
- From a target instance (or nodes in your cluster) that are connected to the same network:
- Run the mount command you copied
- Confirm the mount worked by verifying the mount point is accessible and read/write as expected
- From a target instance (or nodes in your cluster) that are connected to the same network:
View filesystem details
Click any filesystem in the list to view its detail page. The detail page includes:- Overview — filesystem status, capacity, attached VPCs, and mount command
- Configuration — capacity, root squash, POSIX ACL, and
atimeupdate interval - Instances — all instances in the attached VPCs that can access this filesystem, with search filtering
- Snapshot policies — schedules, retention, and provisioning state for each policy
Attachment status and mount options
Each filesystem attachment reports its provisioning status. The status reflects the actual observed state of the attachment, not just the desired configuration:
When an attachment is provisioned, the API also returns mount options — specifically a
remoteports field containing the IP range of the NFS storage endpoints. You can use this range for client-side NFS mount tuning when you need to distribute NFS traffic across multiple storage IPs for better throughput and resilience.
Mount options are returned in the API response under
mountOptions on each attachment. For most use cases, the standard mount command shown in the console is sufficient. Use the remoteports value only when you need advanced NFS client configuration.Quotas
To check your current filesystem quota, go to the Resource Usage section on the Dashboard. The dashboard shows your filesystem storage usage (e.g., 1 GiB / 1 TiB) alongside GPU, server, cluster, and network quotas.Common issues / troubleshooting
- Symptom: You can’t attach the filesystem to the selected network Likely cause: The network is in a different region from the filesystem. Fix: Check the filesystem’s region, and choose a network in the same region.
- Symptom: The mount command fails from your instance/cluster Likely cause: The instance/cluster is not in the attached network, or network access rules prevent NFS connectivity. Fix: Confirm the compute resource is connected to the same network the filesystem is attached to. Then verify network/security rules permit NFS traffic (exact ports/rules depend on your setup).
- Symptom: No mount command is shown in the filesystem details Likely cause: No VPC has been selected for the filesystem. Fix: Edit the filesystem and select a VPC. The mount command will appear once a VPC is attached.
-
Symptom: A snapshot policy is rejected or does not provision
Likely cause: The policy name, schedule, or retention does not match the validation rules. Common issues include using a non-UTC time, setting
timeOfDayon an hourly policy, omittingdayOfWeekon a weekly policy, or using a monthlydayOfMonthafter28. Fix: Update the policy so the schedule fields match its cadence andkeepis at least1. -
Symptom: Existing snapshot policies changed after an API update
Likely cause: API updates replace the full
snapshotPolicieslist when a non-empty list is supplied, or clear all user-managed policies when[]is supplied. Fix: Include every policy you want to keep in the update request. OmitsnapshotPoliciesif you only want to update other filesystem fields. -
Symptom: A policy named
system-defaultis rejected Likely cause: Default Snapshot Protection is enabled or is still cleaning up, sosystem-defaultis reserved for the platform-managed policy. Fix: Use a different policy name, or wait until Default Snapshot Protection has been disabled and cleanup has completed before claiming that name. - Symptom: POSIX ACL tools do not work on the mounted filesystem Likely cause: Extended POSIX ACLs are disabled, or you mounted the filesystem using NFSv4.1. NFSv3 is the supported management path for extended POSIX ACLs. Fix: Enable POSIX ACLs and mount the filesystem using NFSv3 before creating or modifying extended ACLs.
- Symptom: Existing ACLs remain enforced after POSIX ACL is disabled Likely cause: Disabling POSIX ACL support does not delete existing ACL metadata. Fix: Re-enable POSIX ACLs, manage the existing ACLs over NFSv3, and then disable the setting again if required.
-
Symptom: File access does not update
atimeLikely cause: The interval is0, which disables read-driven updates, or the currentatimeis not yet older than a configured positive interval. Fix: Set a positiveatimeupdate interval (seconds) and wait until the existingatimeis older than that interval before testing another read.
Related resources
VPC Networks
Create the network your filesystem attaches to
Instances
Mount the filesystem from your compute instances
Managed Kubernetes (NKS)
Access shared storage from your Kubernetes clusters
File storage on NKS
Provision and mount filesystems from NKS pods with the CSI driver
API Reference
Manage filesystems programmatically via the Networking and Storage API