

Organization-level access required. The Topology View needs organization-level read access to reservation topology. A project-level grant isn’t enough. See Permissions.
Summary
This page explains where to find the Topology View in the Nscale Console, how to read the grid and its legends, how to filter it down to single reservations and the placements within them, and what the different states mean. Use this guide if you:- Want to see which reservations and placements hold which hosts across your organization or project
- Need to check how a Pack or Spread placement actually landed across NVLink domains
- Are planning a new reservation and want to see allocated and unreserved capacity at a glance
Where to find it
The Topology View tab appears in three locations. Each one shows the same grid at a different scope: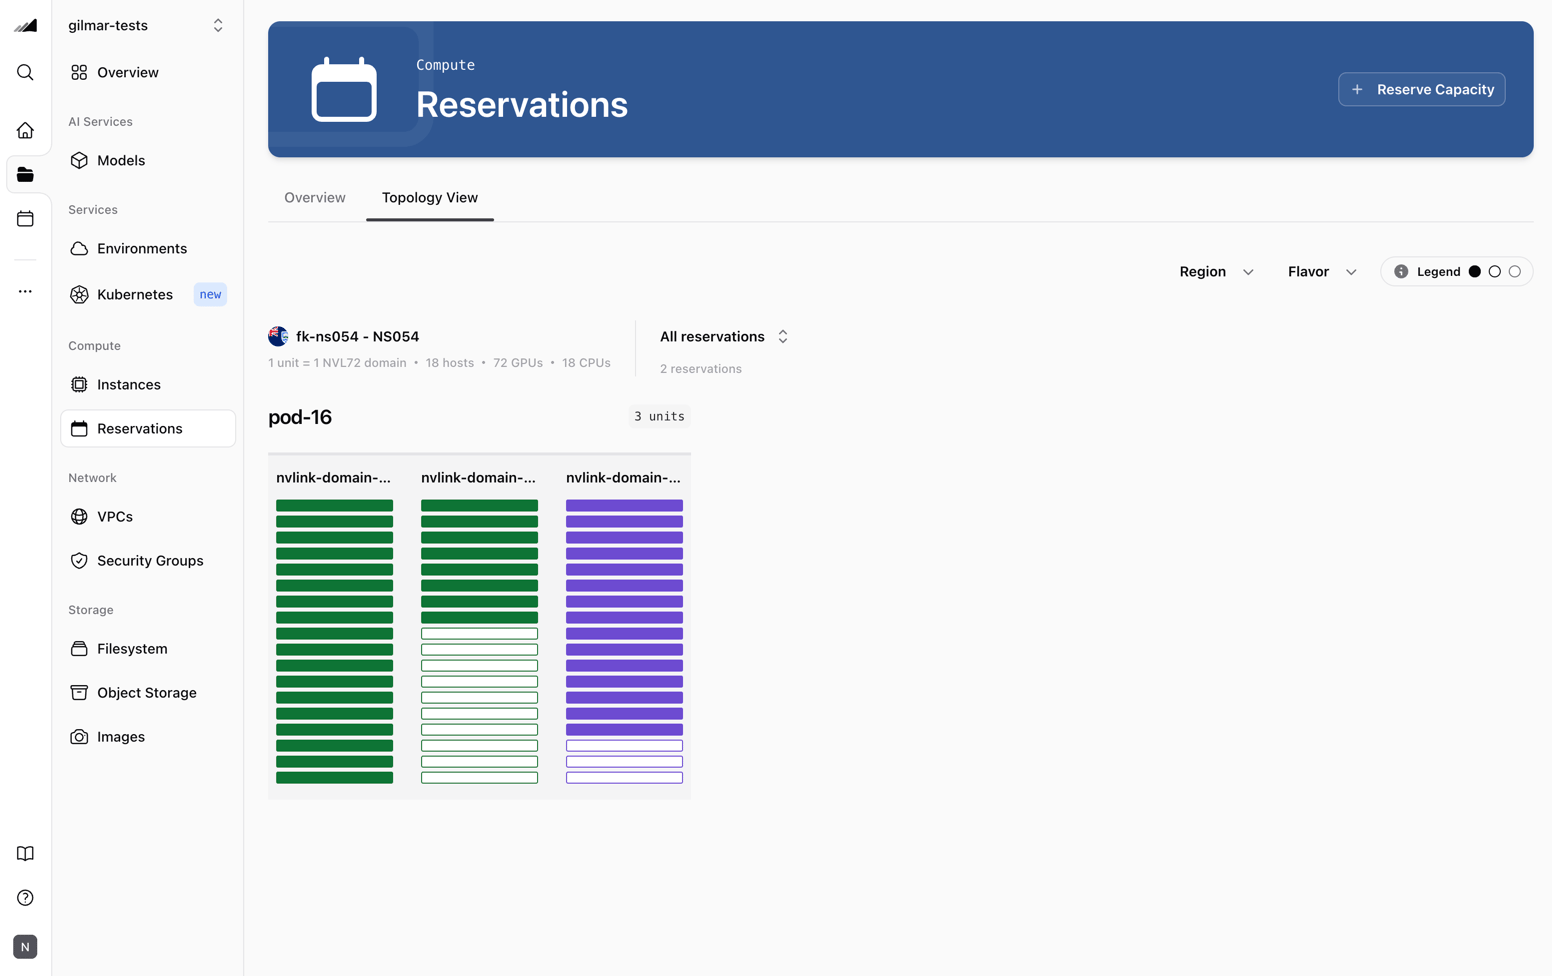
Reading the grid
The grid is split into one section per region and flavour. Each section is laid out from the top down:- Section header. The region and flavour, for example
<region> - GB300, followed by the unit shape:1 unit = 1 NVL72 domain, then the hosts, GPUs, and CPUs in one unit. - Pods. Each pod is labeled with a badge showing how many units it holds.
- Domain cards. One card per NVLink domain. A domain is one reservation unit.
- Host bars. One bar per host in the domain.
Legend
Hover Legend in the toolbar to see what each bar style means. When a reservation is selected, the legend changes to explain which placement each bar’s color represents, instead of which reservation.Colored by reservation
In the organization and project Topology Views, the grid shows each reservation in a different color when the page loads:Colored by placement
Select a reservation either by clicking it in the grid or by using the reservation filter. The grid then updates to show that reservation’s placements, with each color representing a different placement. Use the placement filter to focus on a specific placement. Hover over a host bar to view details about the placement that holds it.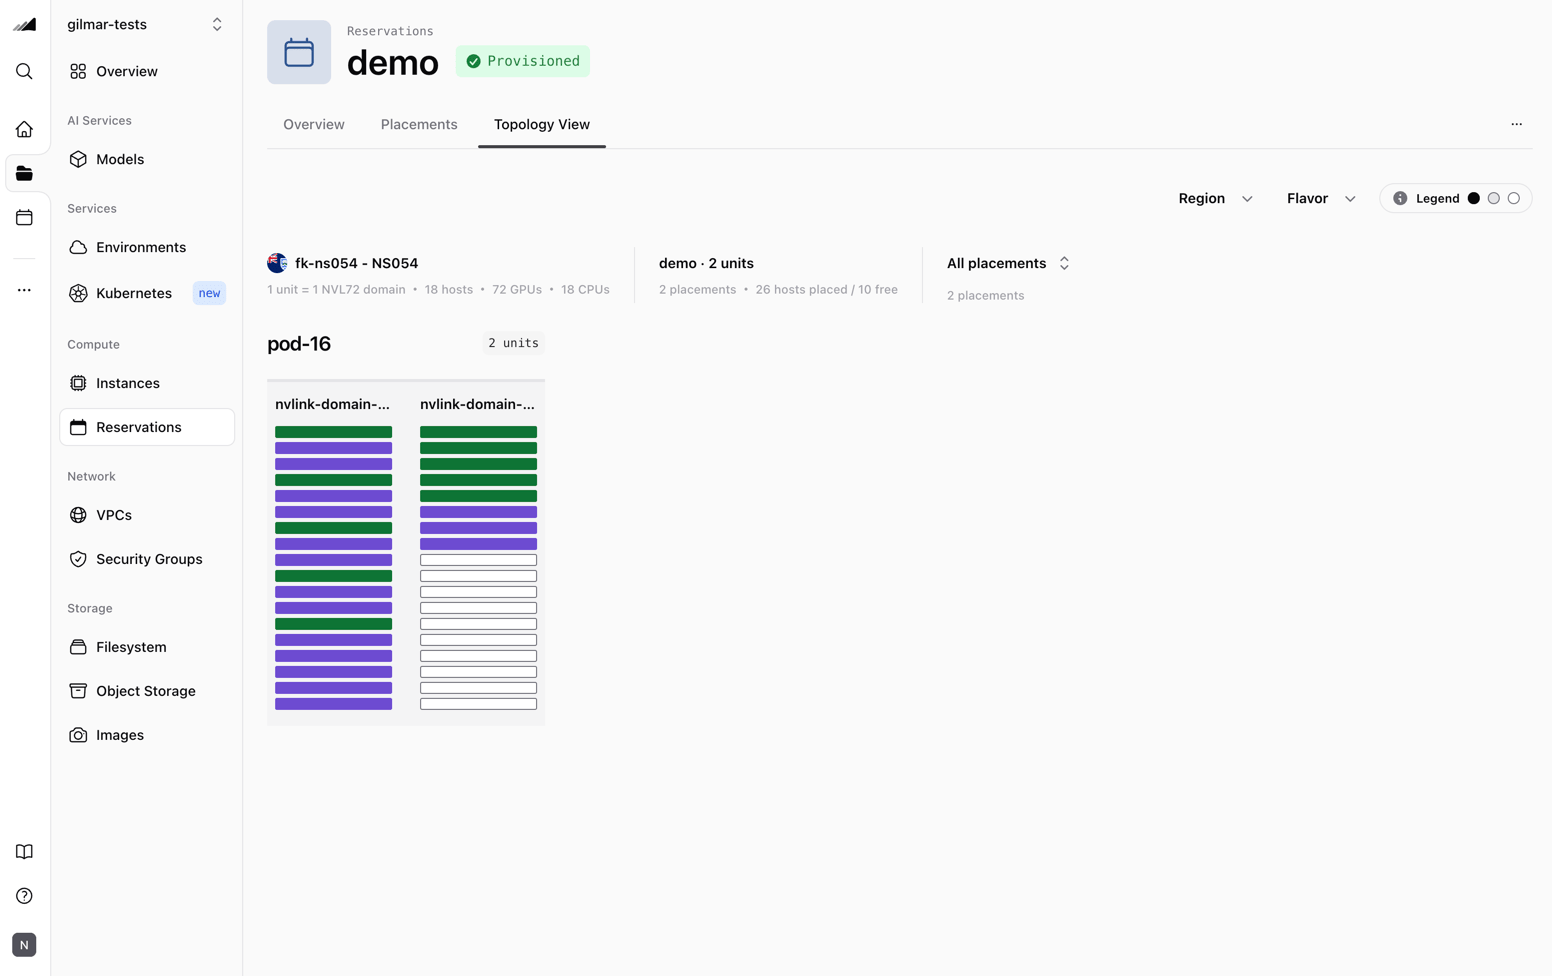
Interacting with the grid
Hover for details
Hover over a host bar to highlight all hosts held by the same reservation or placement. The rest of the grid dims, and a tooltip shows details about the item you’re hovering over: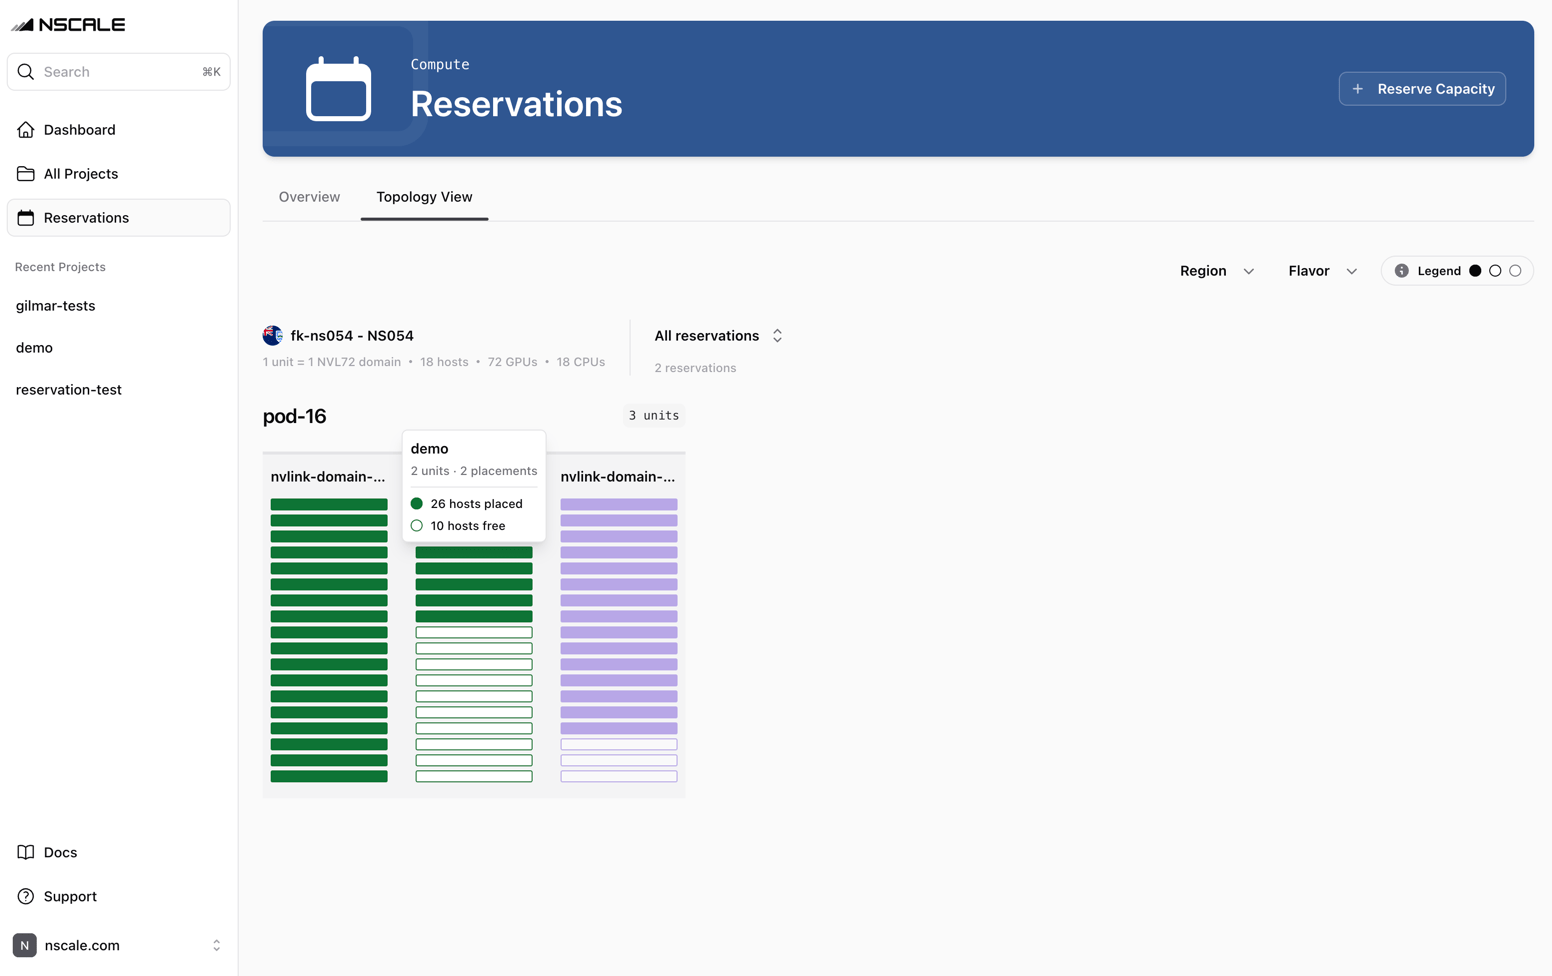
Click to open
Click a bar to open what it belongs to:- When the grid is colored by reservation, select a reservation either using the reservation filter or by clicking it in the grid. The view then switches to show that reservation’s placements. Clicking opens the reservation’s own Topology View tab, while the filter keeps you on the current page.
- When the grid is colored by placement, a click opens the placement’s detail page.
Filter the view
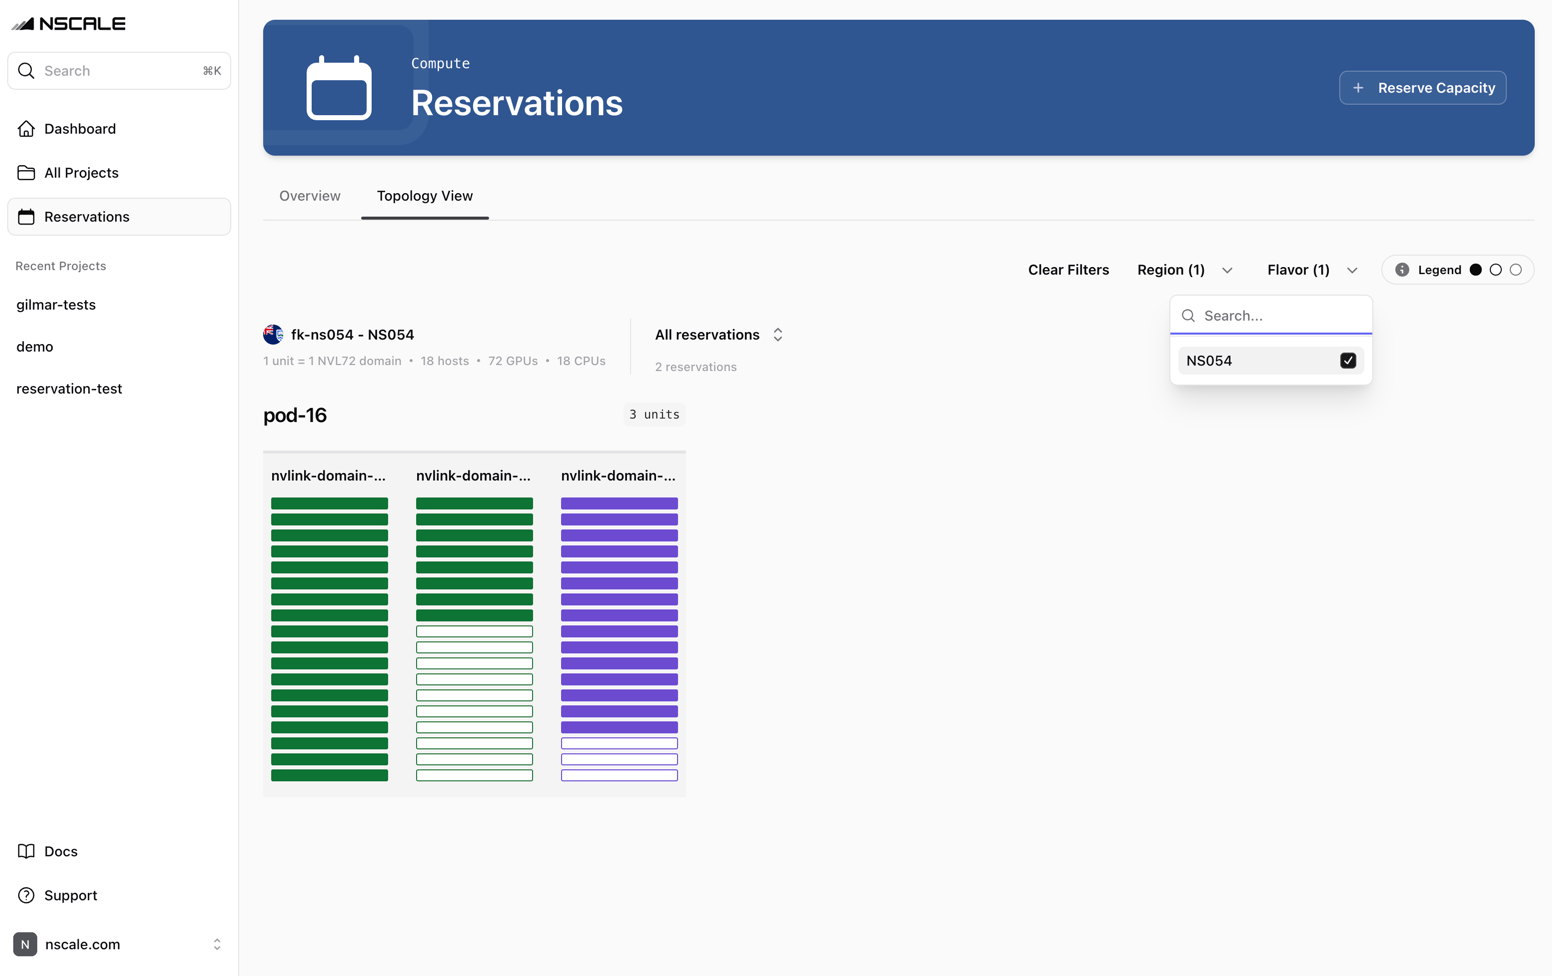
The Topology View is broken down by each region and flavour, with each section having its own filter header. You can use the overall Region and Flavor filters in the toolbar to filter the entire view across all sections. Both are multi-select. Within each region and flavour section, you can also use the section-level filters to filter its reservations and placements:- The reservation picker in each section header, labeled All reservations by default, lets you select a single reservation. Once selected, the grid shows placement coloring for that reservation.
- The placement picker, labeled All placements by default, appears once a reservation is selected and placements are available. It lets you select a single placement, with the label showing its position in the list, for example
1/3 training. - The arrow button next to a selected reservation or placement opens its detail page.
- Clear Filters resets every filter at once.
Pack and spread in the grid
The Topology View is the easiest way to see how a placement policy was applied and how the resulting placements were distributed:- Pack placements show up as contiguous runs of bars, filling one domain before moving to the next.
- Spread placements show up scattered evenly across the reservation’s domains.
How colors are assigned
The grid uses a palette of eight colors:- Colors repeat once more than eight reservations or placements are in view.
- Neighboring bars rarely share a color, so where two reservations or placements meet you can almost always see the boundary.
- A color identifies a reservation or placement only within the current view. It can change after the data refreshes, when you apply a filter, or when you switch between reservation and placement coloring. Use the tooltip or the picker to confirm which one you’re looking at.
Reserve capacity from the organization page
Because the organization Reservations page isn’t tied to a specific project, selecting Reserve Capacity first opens a dialog asking you to choose which project the reservation should be created in:1
Open the dialog
Click Reserve Capacity in the page header. If the organization has no allocated topology yet, the Topology View’s empty state has a Reserve Capacity button that opens the same dialog.
2
Choose a project
The dialog lists only the projects you’re allowed to reserve capacity in. Use Search Project to narrow the list, then select one.
3
Reserve capacity
The console opens the reservation wizard in that project. Continue from Reserve capacity.
Permissions
The Topology View requires organization-level read access toreservation:topology. A project-level grant alone is not sufficient, even when you open the tab from a project page.
The reservation-capacity-manager and reservation-capacity-reader roles include this permission when assigned at organization level. See Roles and groups.
- Without this permission, the Topology View tab is hidden on every page, and the See topology button is hidden from the Capacity card.
- If the request is refused, the tab shows Topology unavailable: “Viewing allocated topology needs organization-level access to reservations. Ask an organization administrator for access.”
- Hosts in projects you can’t read still appear, so the grid reflects everything allocated to the organization, but they’re drawn as Other projects with no reservation or placement details.
Empty states
Limitations
- Mouse only. Host bars can’t be focused with the keyboard. To open a reservation or placement without a mouse, select it in the picker and use the arrow button next to it.
- No server details. Bars show which reservation and placement hold a host, not the server running on it. Open the placement to see its servers.
- Region and Flavor filters reset on reload. Only the reservation and placement selection is kept in the URL.
- Refreshes every 30 seconds. The grid updates on its own, so a newly created placement can take up to 30 seconds to appear.
Next steps
- Learn how capacity is structured in Reservations.
- Choose between Pack and Spread in Placements.
- Grant organization-level access in Roles and groups.